The Course
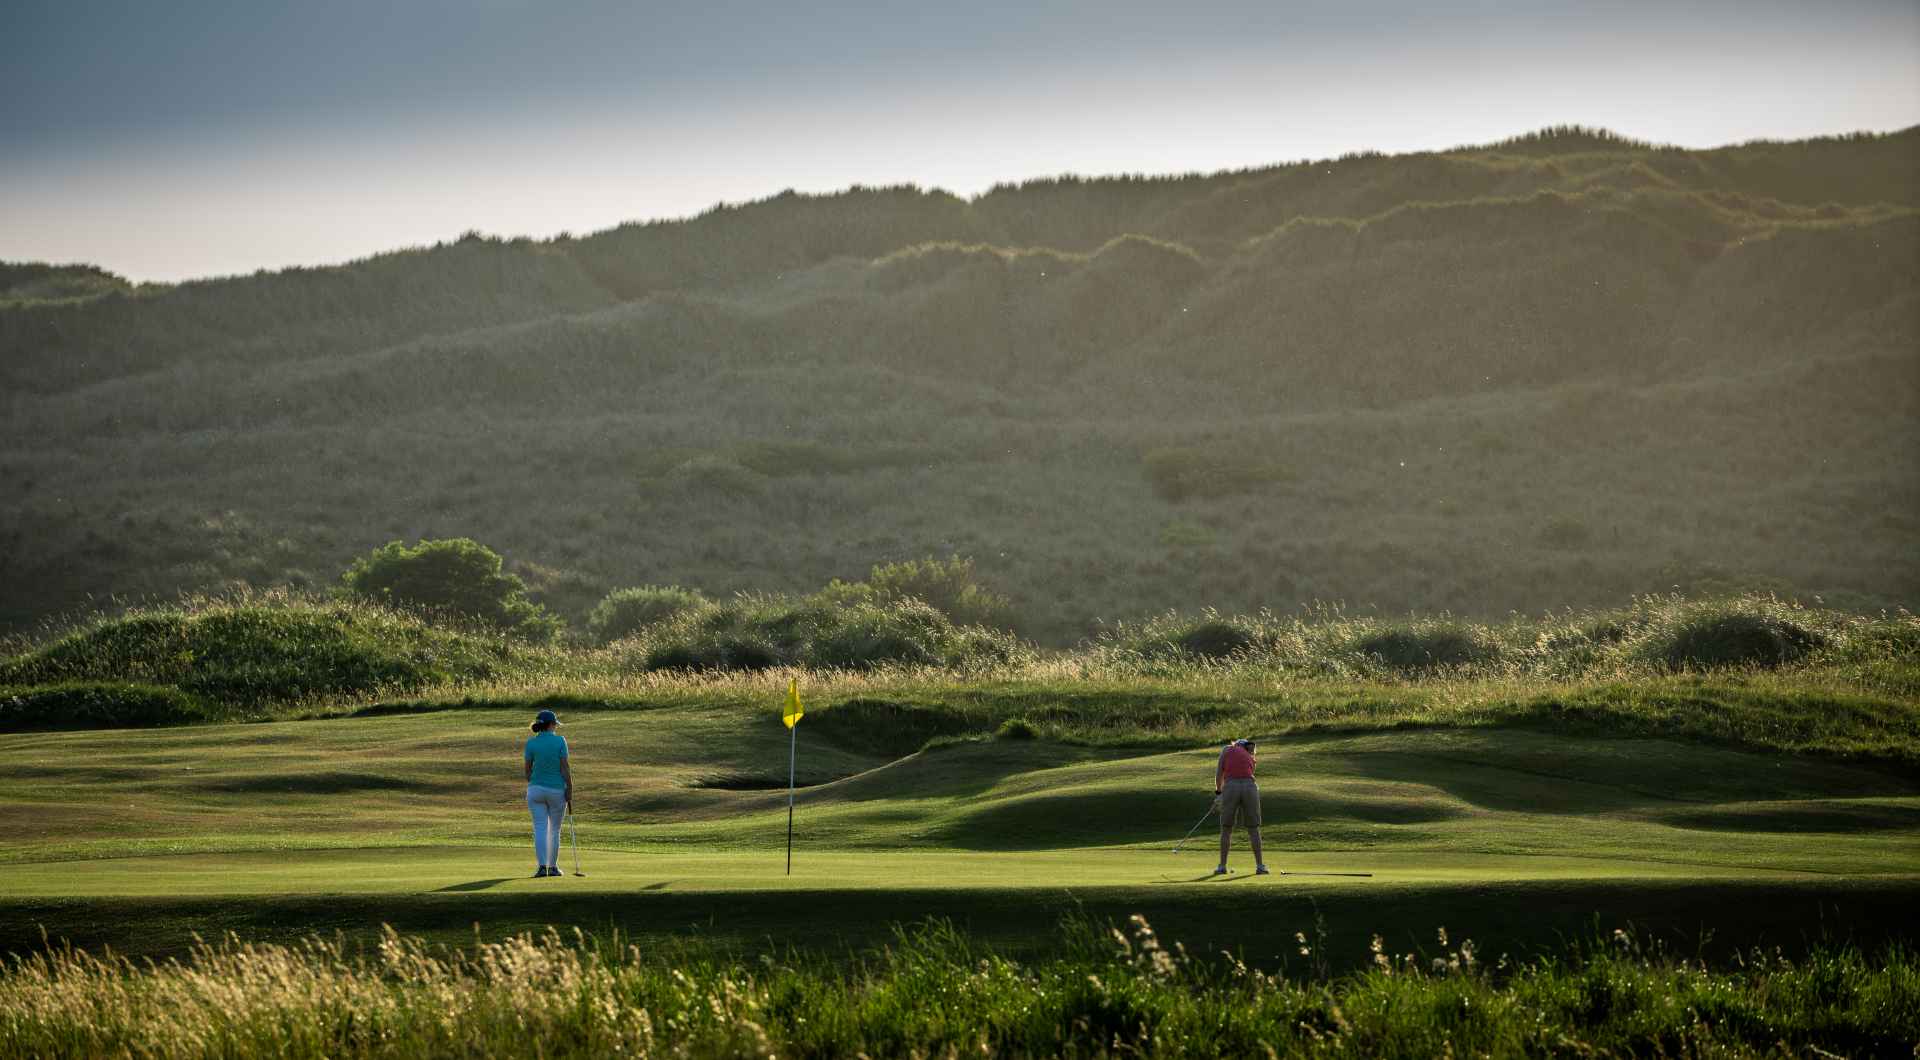
A classic links test shaped by coastal winds, rolling dunes, and the Wild Atlantic Way.
A classic links test shaped by coastal winds, rolling dunes, and the Wild Atlantic Way.
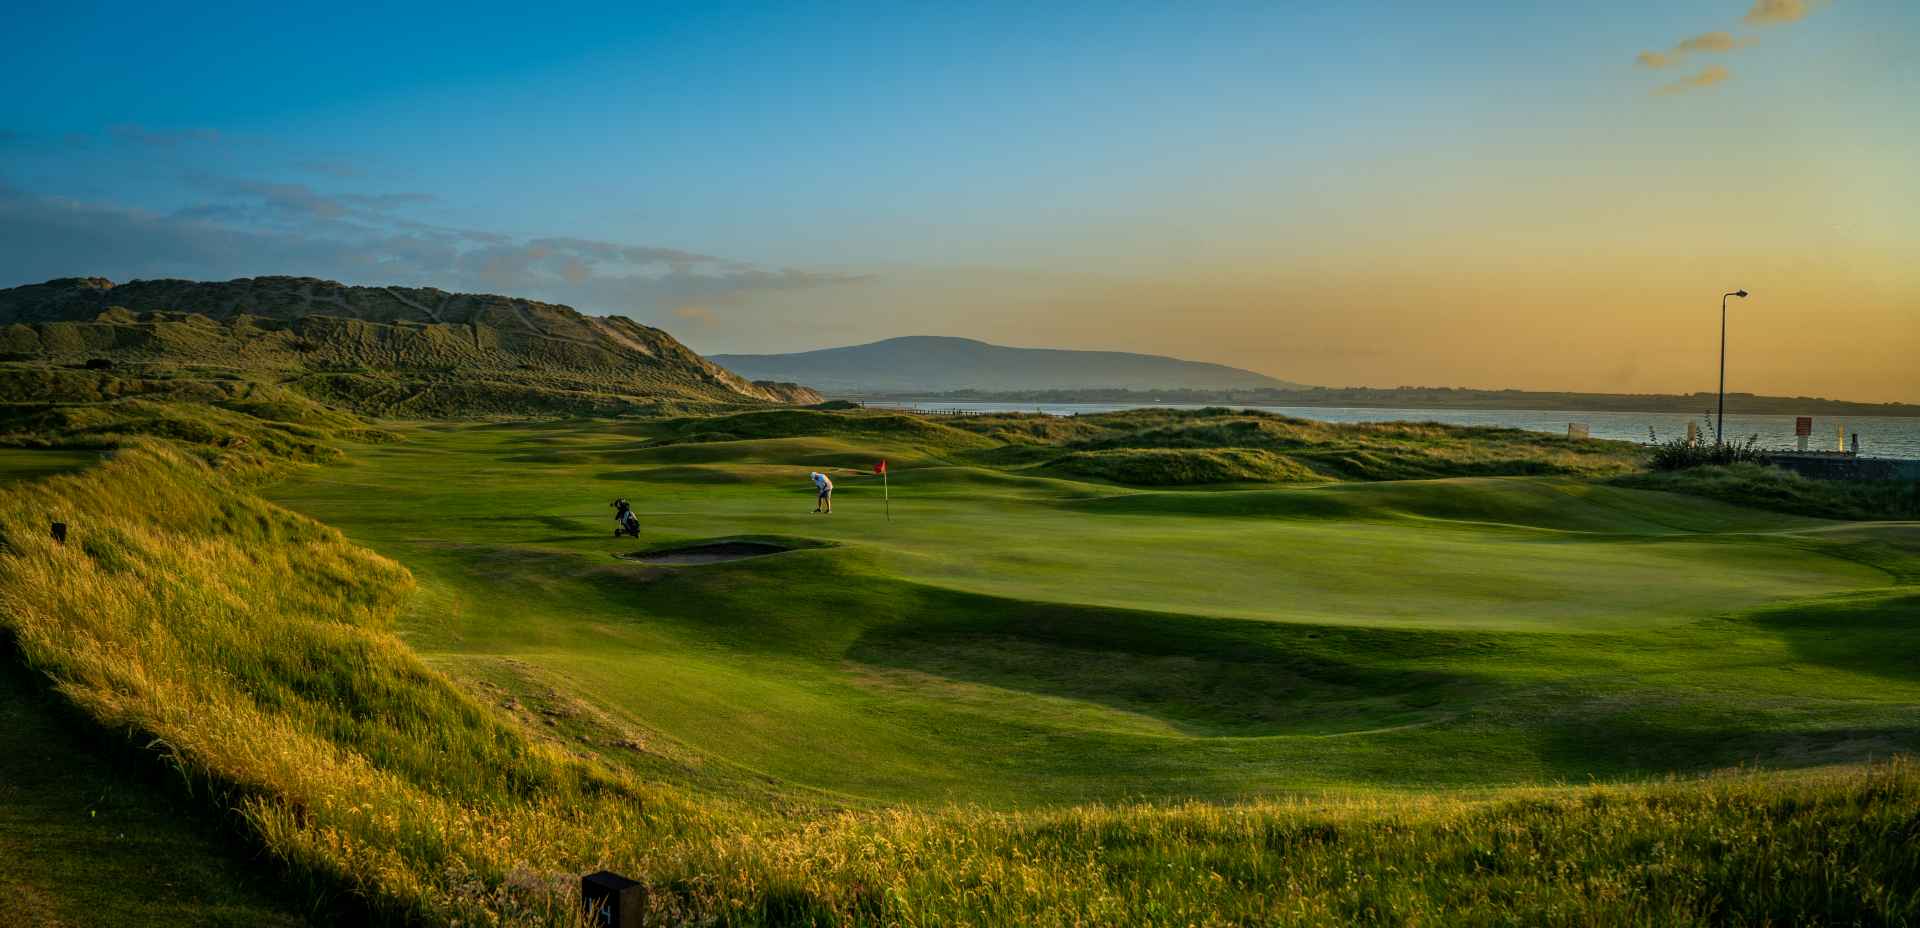
Strandhill Golf Club is a traditional 18-hole links course set along the Wild Atlantic Way in County Sligo. Established in 1931, the par 70 layout is defined by its natural terrain, undulating fairways, and ever-changing coastal winds. Framed by the Atlantic Ocean on one side and Knocknarea mountain on the other, the course offers a true links experience that rewards creativity, shot-making, and local knowledge. Welcoming both members and visitors, Strandhill delivers a challenging yet enjoyable round in one of Ireland’s most scenic golfing settings.
Find essential course details, local rules, safety guidance, scorecards, and player information to help you prepare for your round at Strandhill Golf Club. From out of bounds and penalty areas to etiquette and course layout, this page ensures you arrive informed and ready to enjoy a great links experience.
Strandhill Golf Club continues to evolve as we work to enhance the course for members and visitors while preserving the natural beauty of the surrounding links landscape.
Course Superintendent Jason Kelly is working closely with our course architect Ali McIntosh to carefully develop and refine the course. Their focus is on progressing the links in a thoughtful way that respects the natural terrain while strengthening Strandhill’s reputation as a must play links course in Ireland.
Ongoing improvements are designed to elevate the playing experience while protecting the unique character of the course and its coastal environment. More of this with the official opening of our 4th hole in April…


")


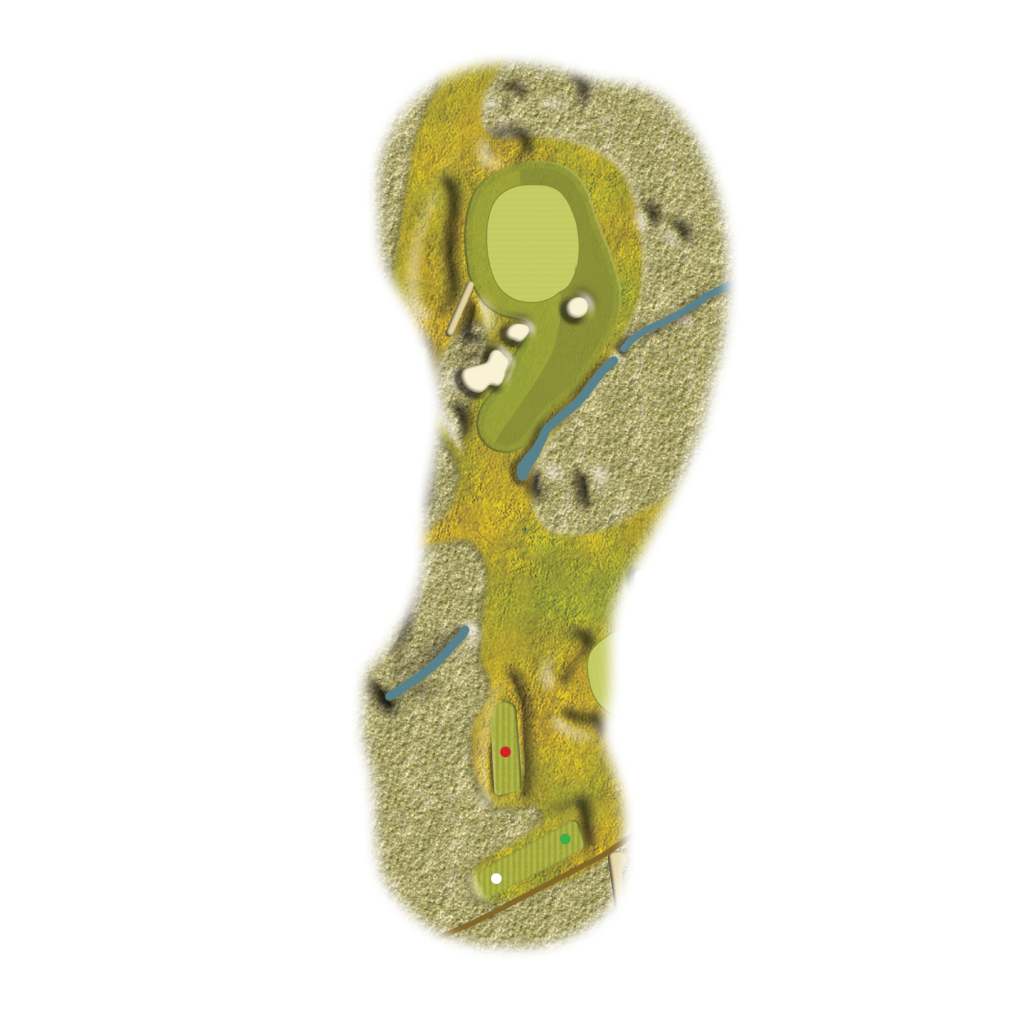
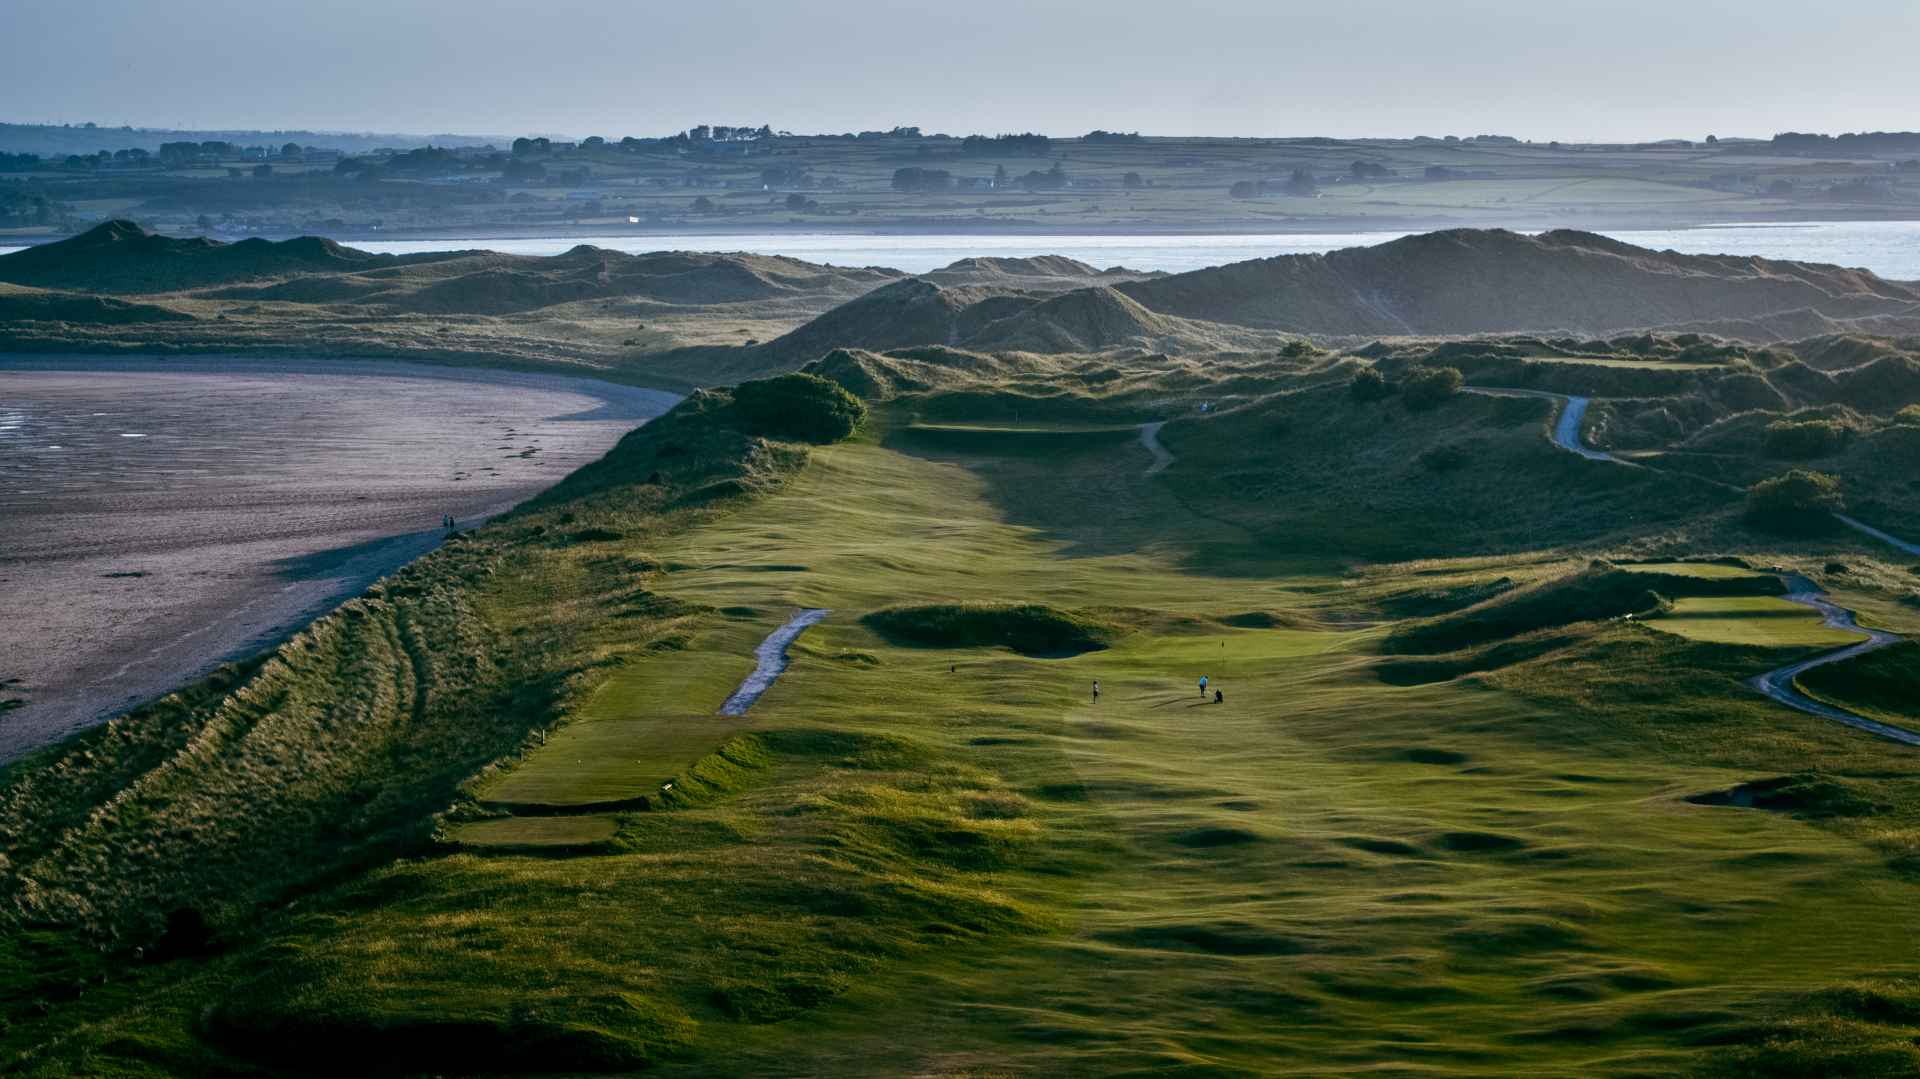
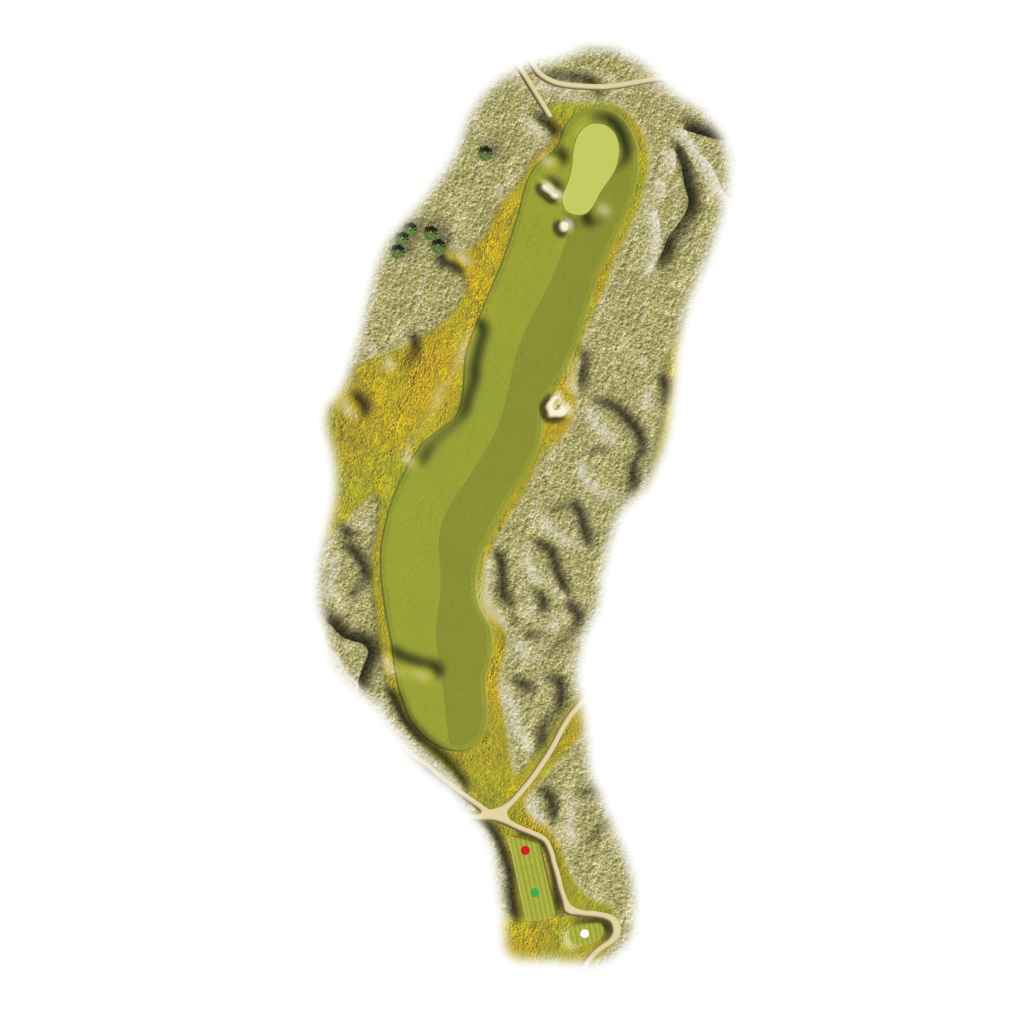
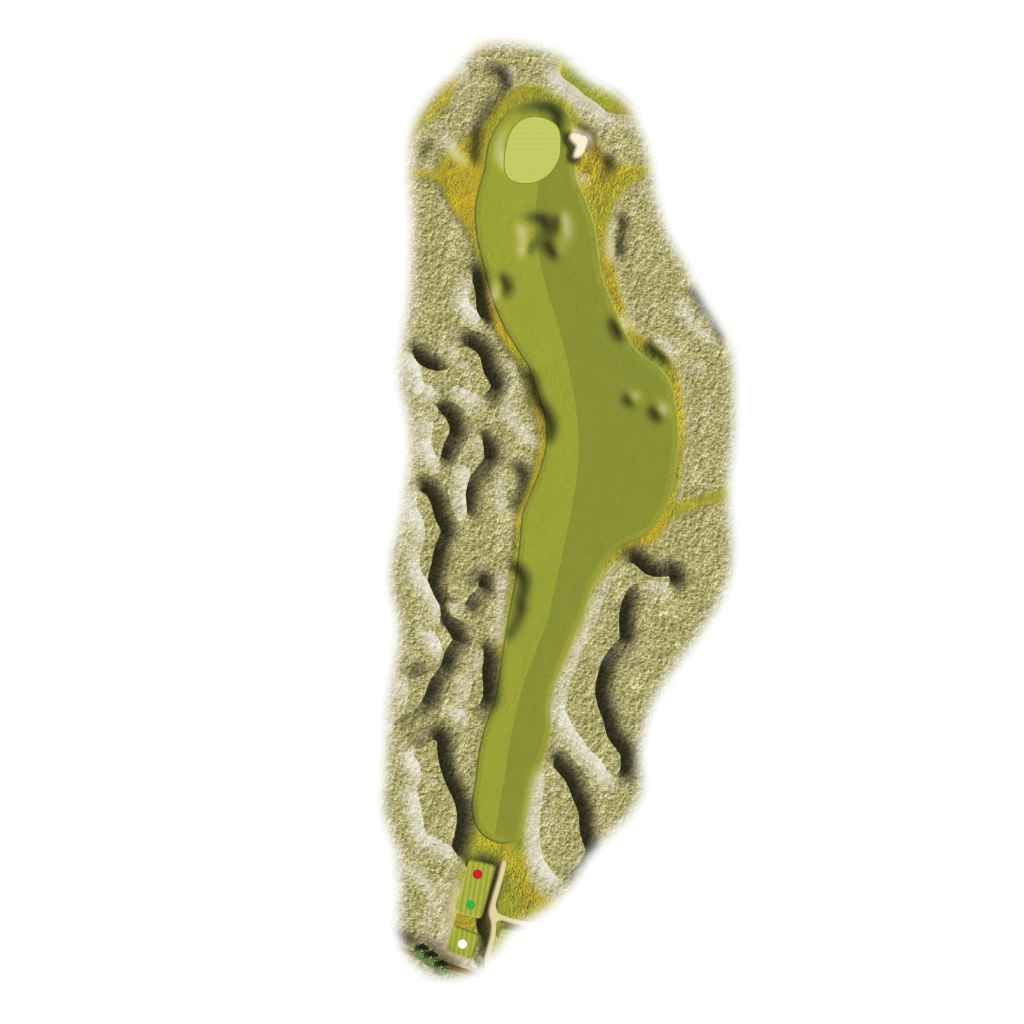
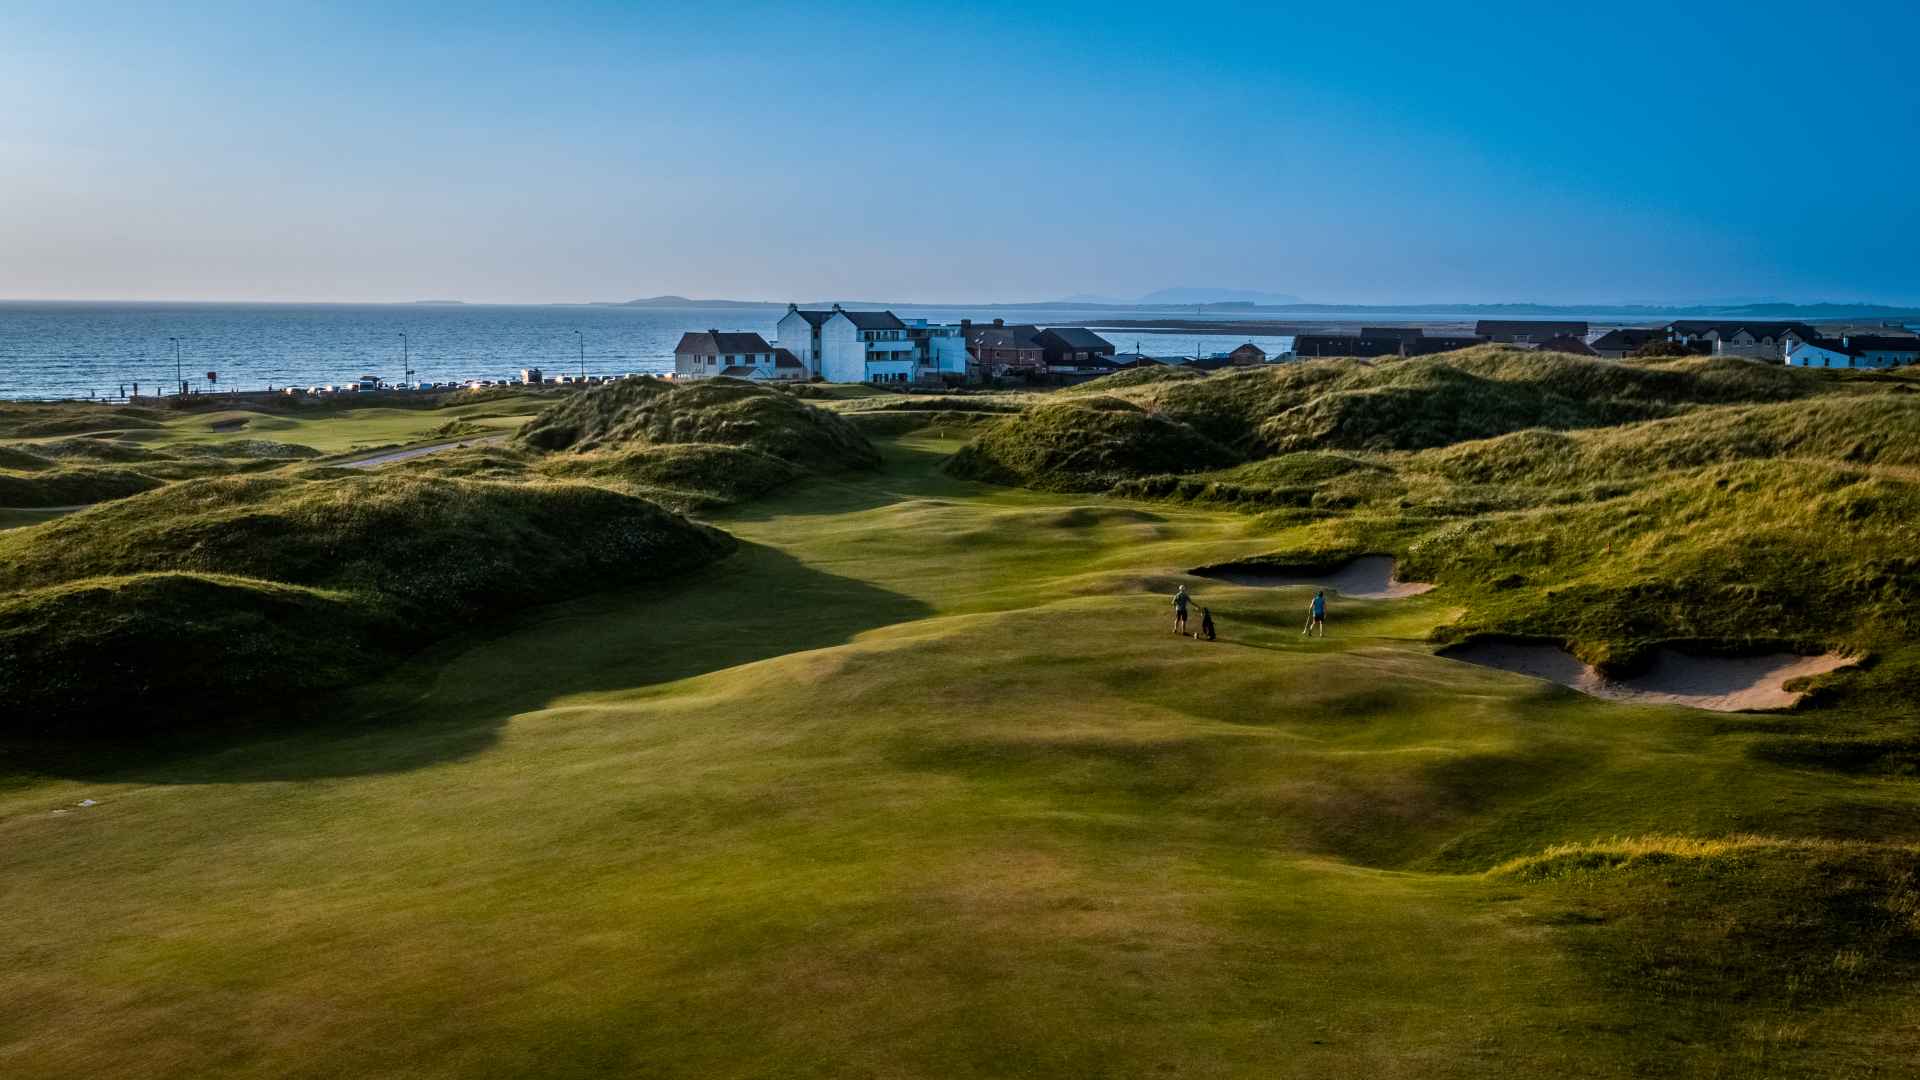
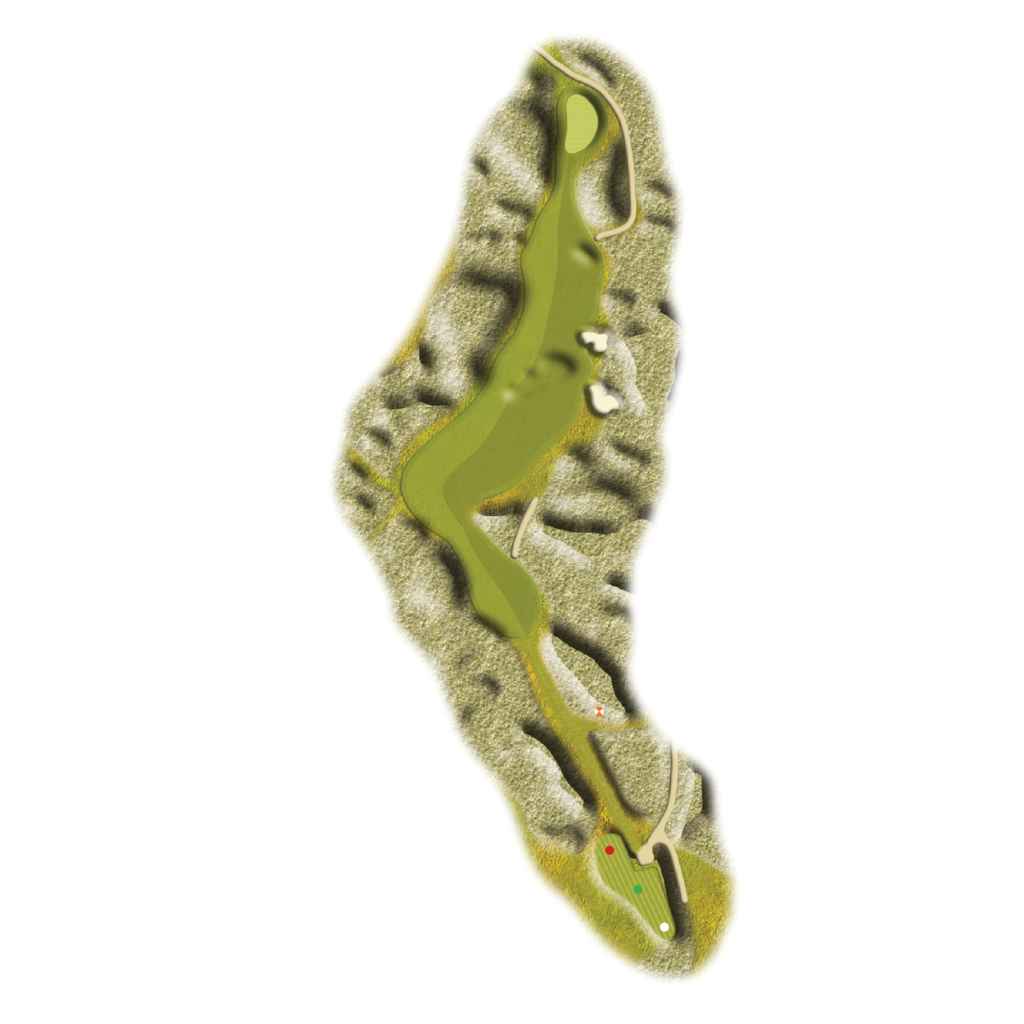
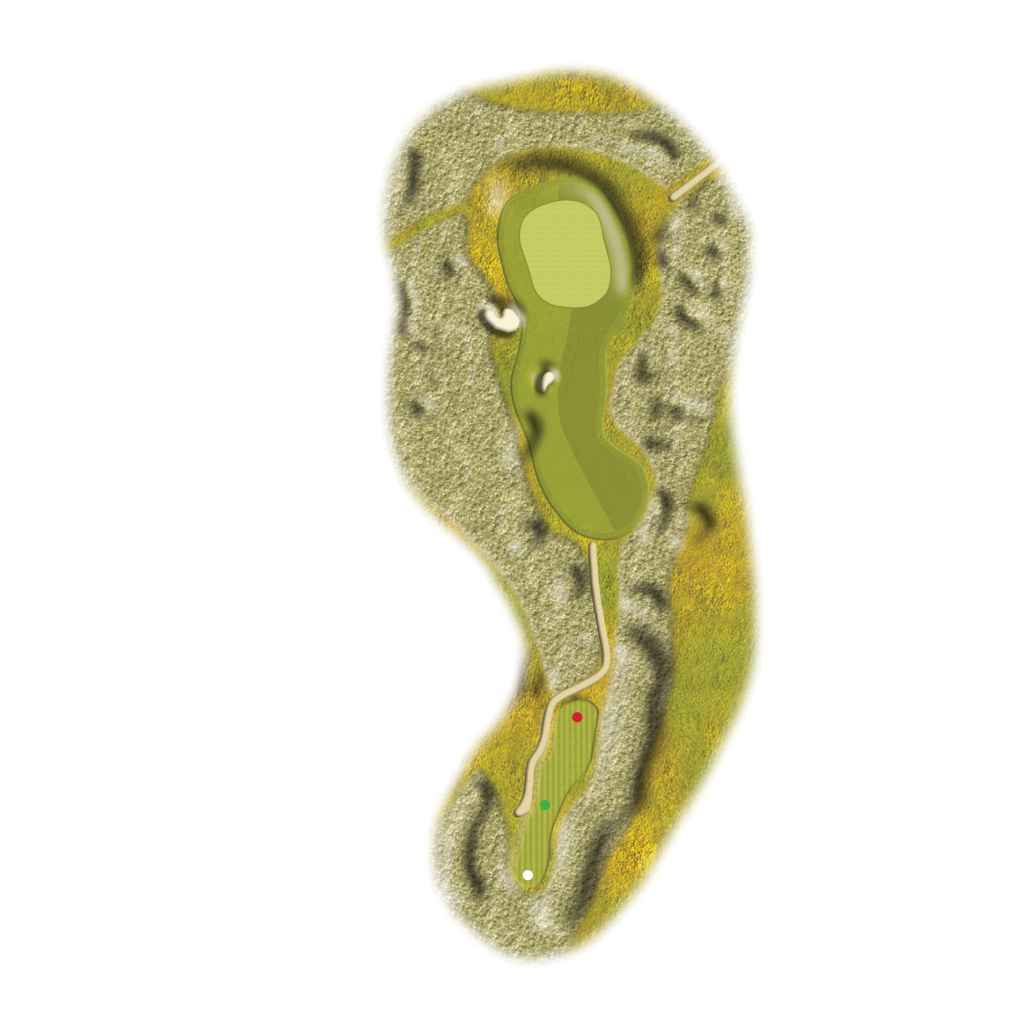
A downhill tee shot entering the gentle dogleg left shows an uneven fairway falling to the right. You will need to allow for the slope and wind of the day to reach the green and create your birdie chance.
Enjoy the view over Culleenamore Beach as you walk down the fairway…
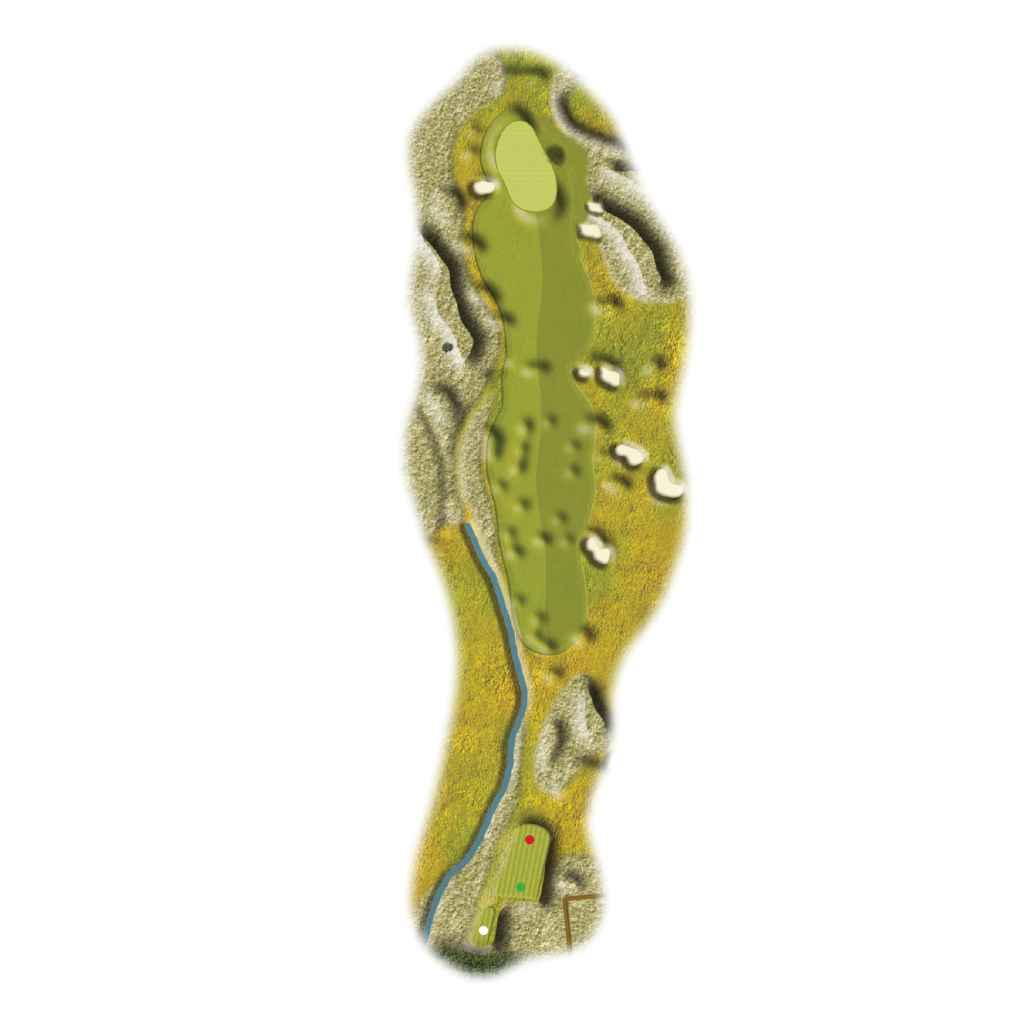
Par 5
(White: 494yds – Green: 472 – Red: 419)
Keep your first drive of the day in play. This opening hole is about keeping on the fairway to approach the green and start with an easy regulation.
When approaching the green, play high left and allow for the slopes to release your ball nearer the hole. Use enough clubs to clear the bunkers too…
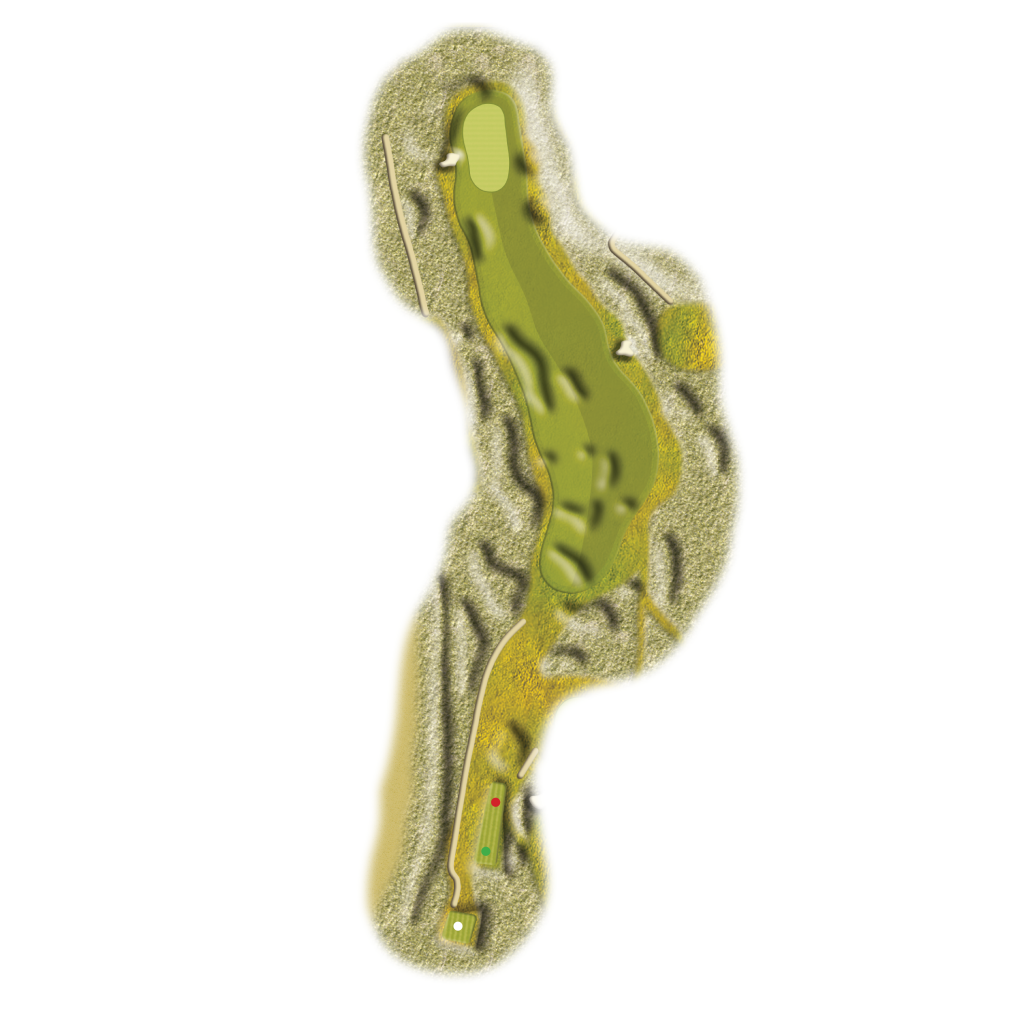
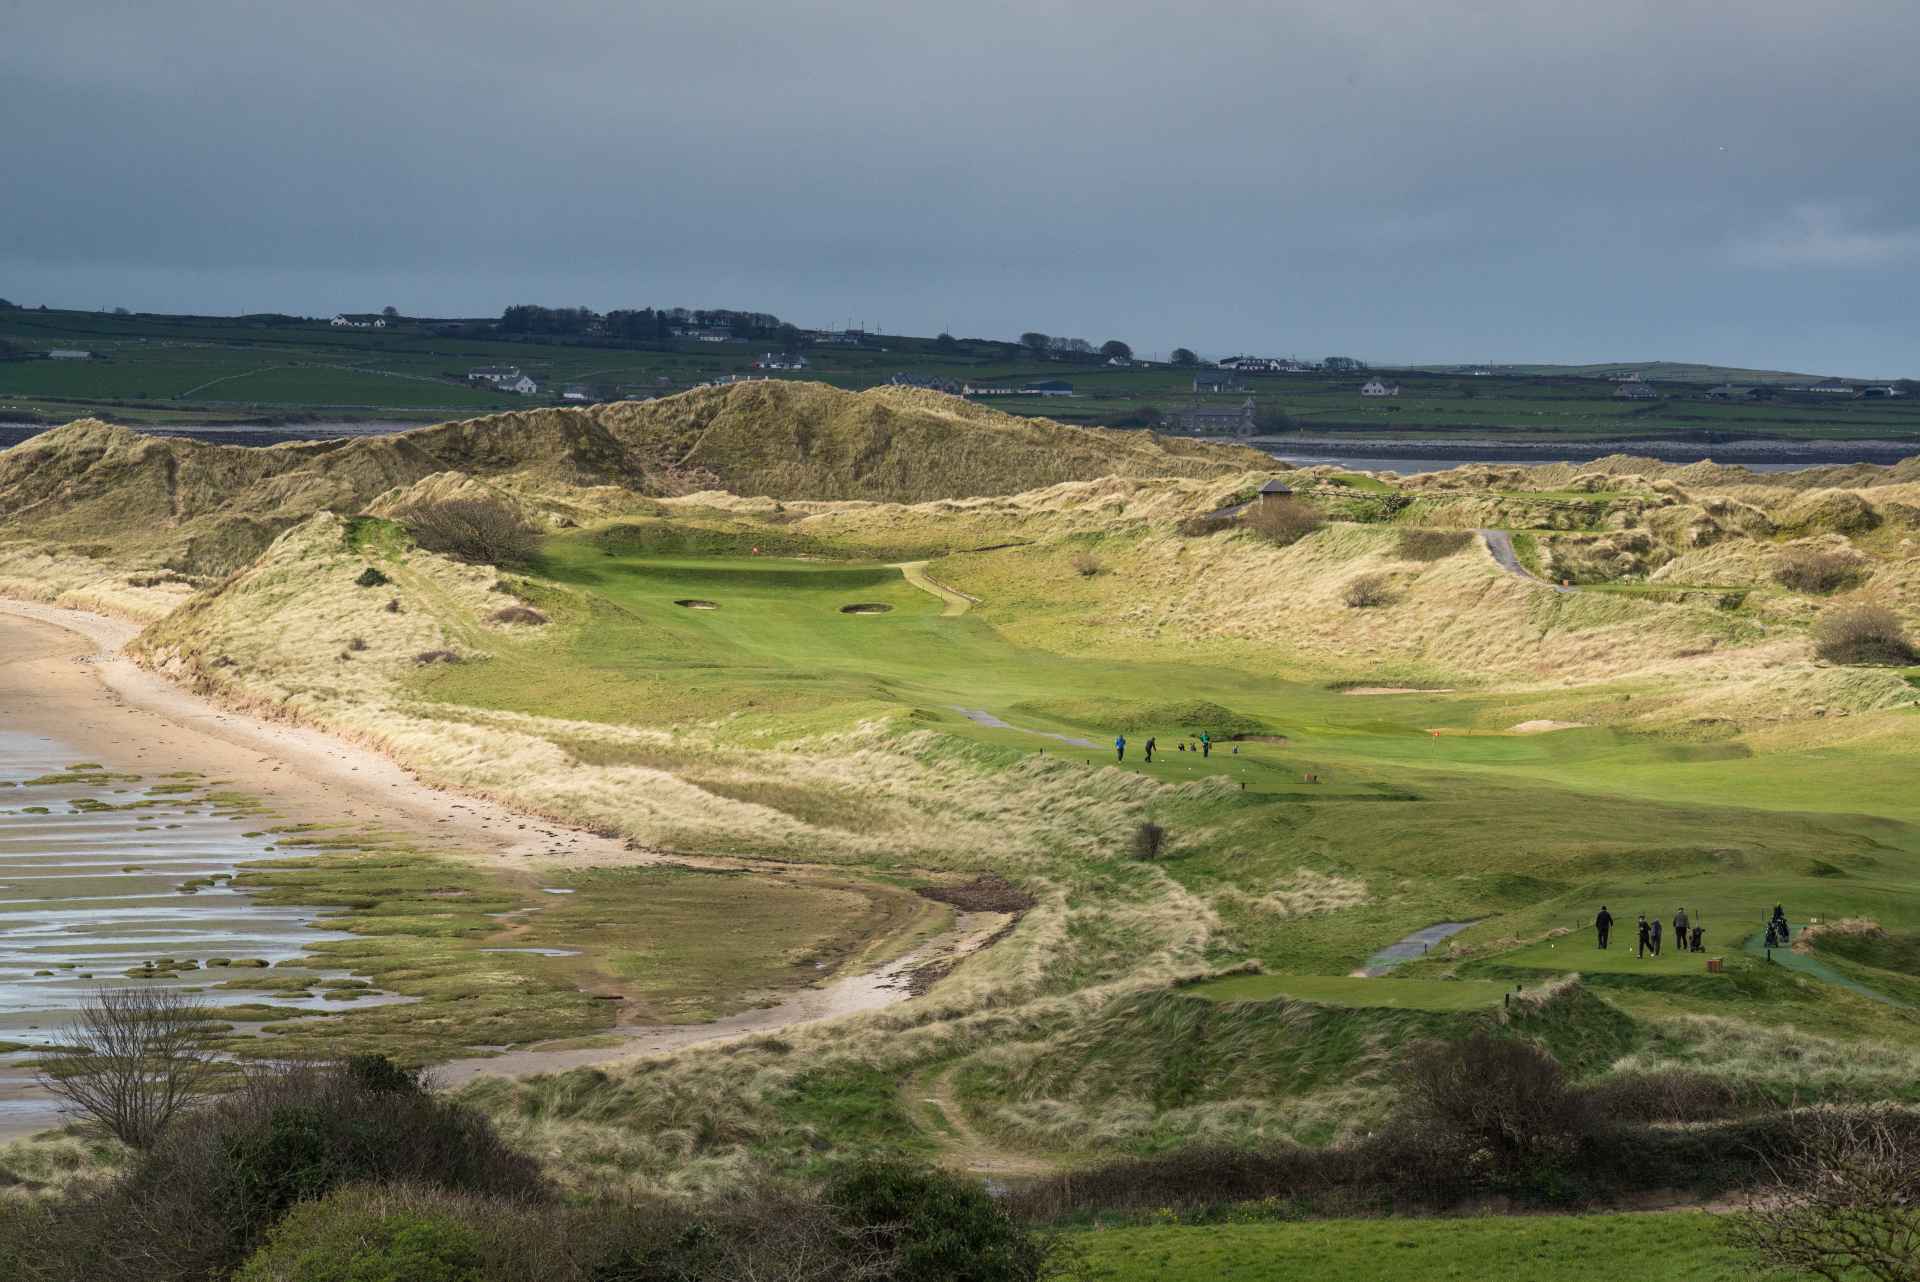
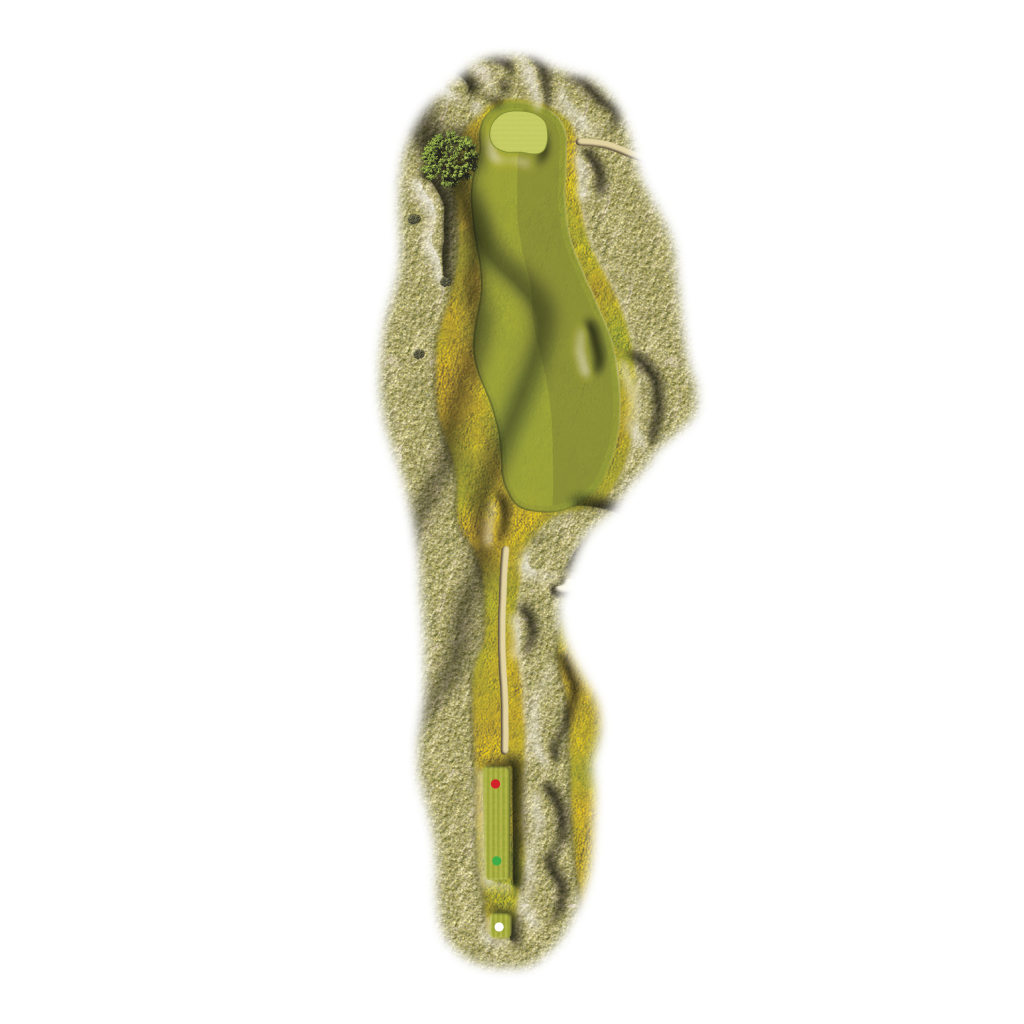
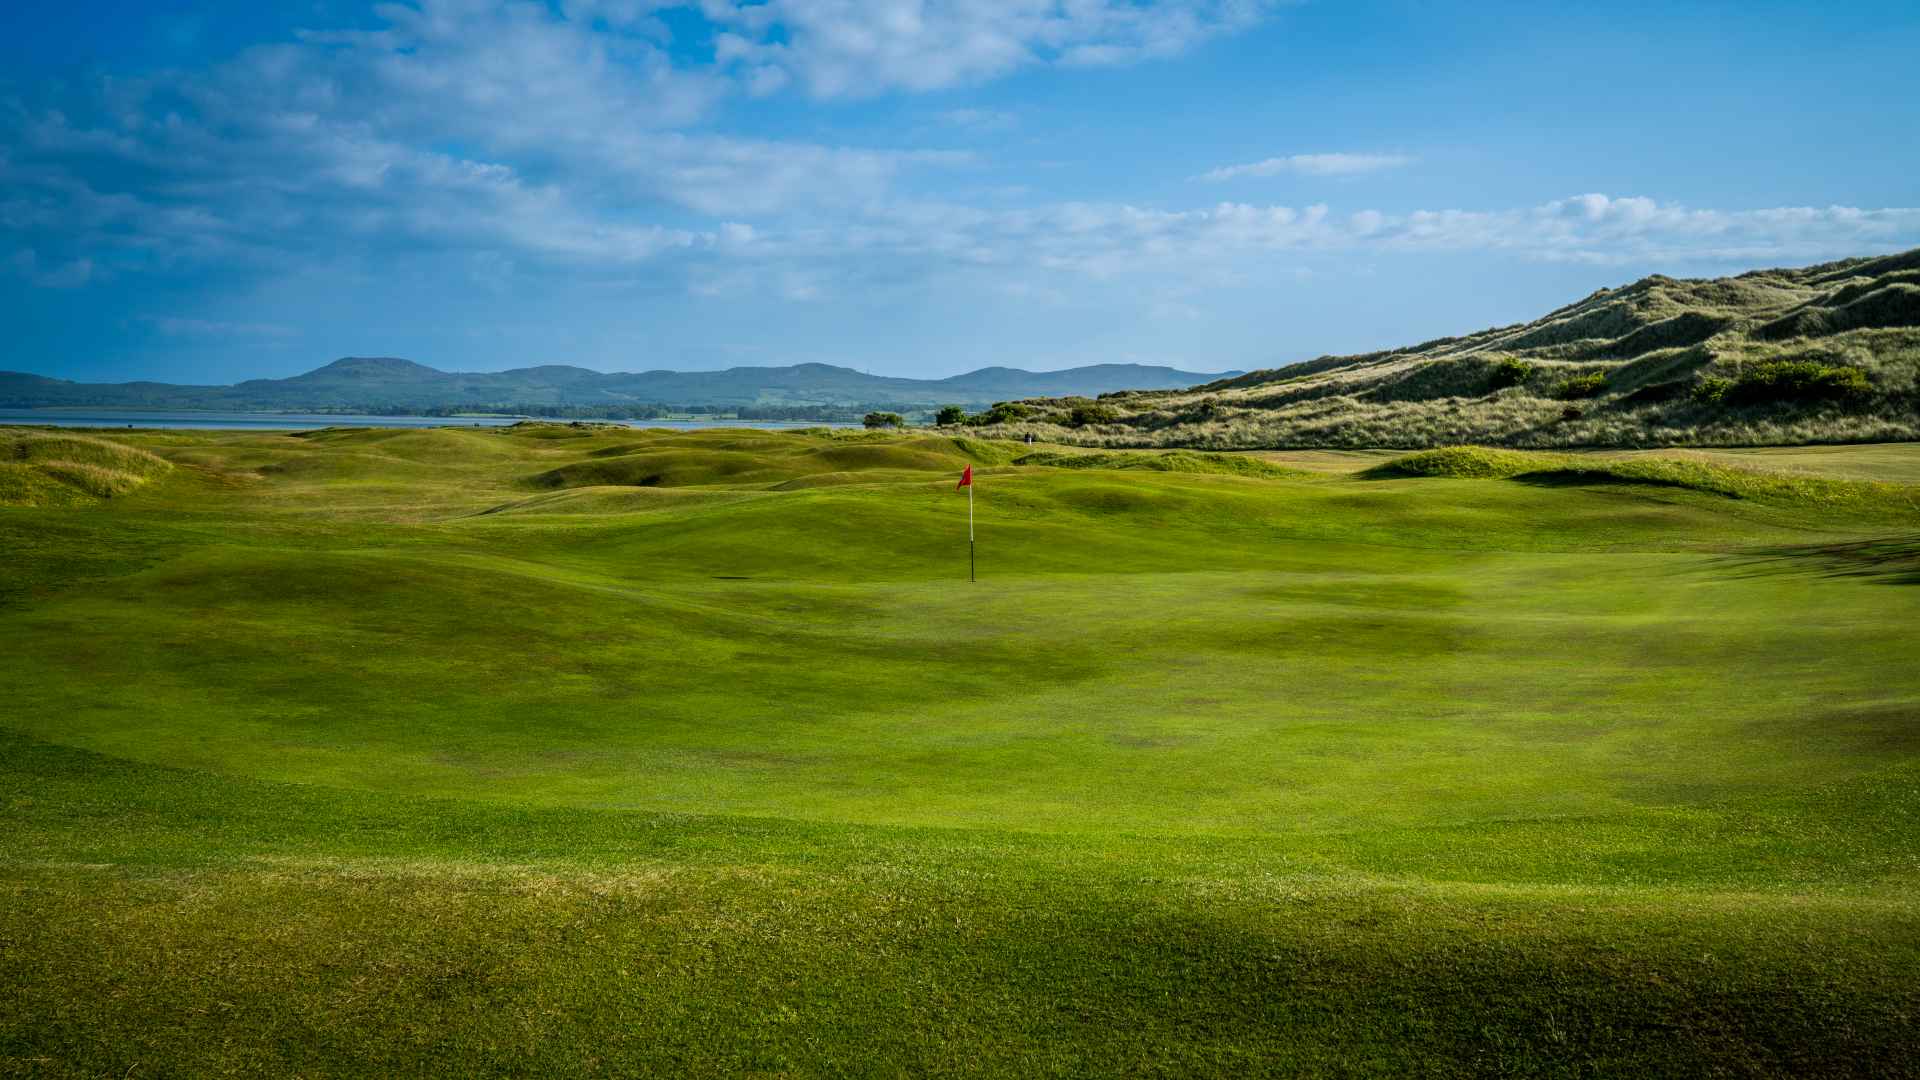
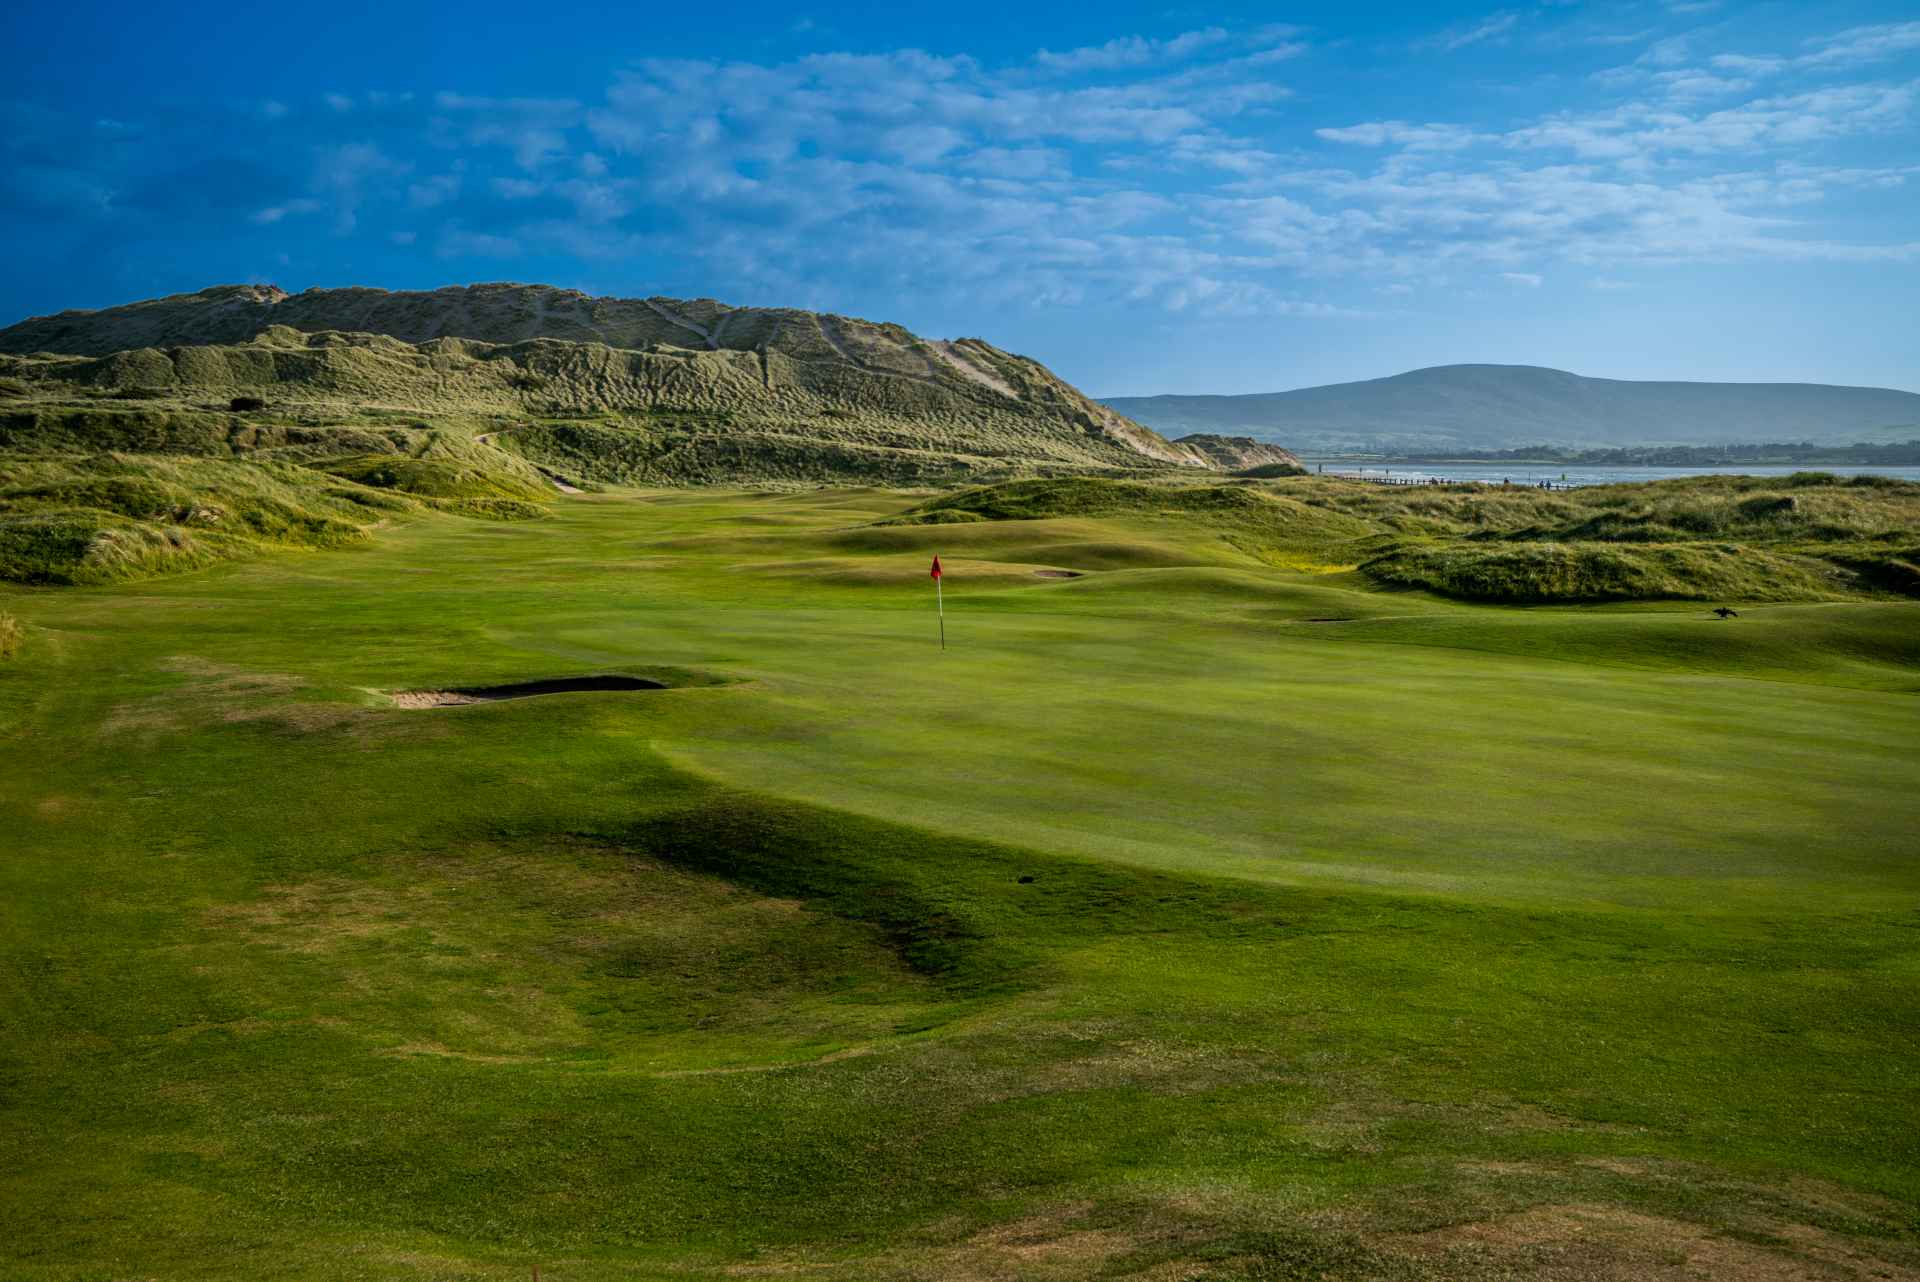
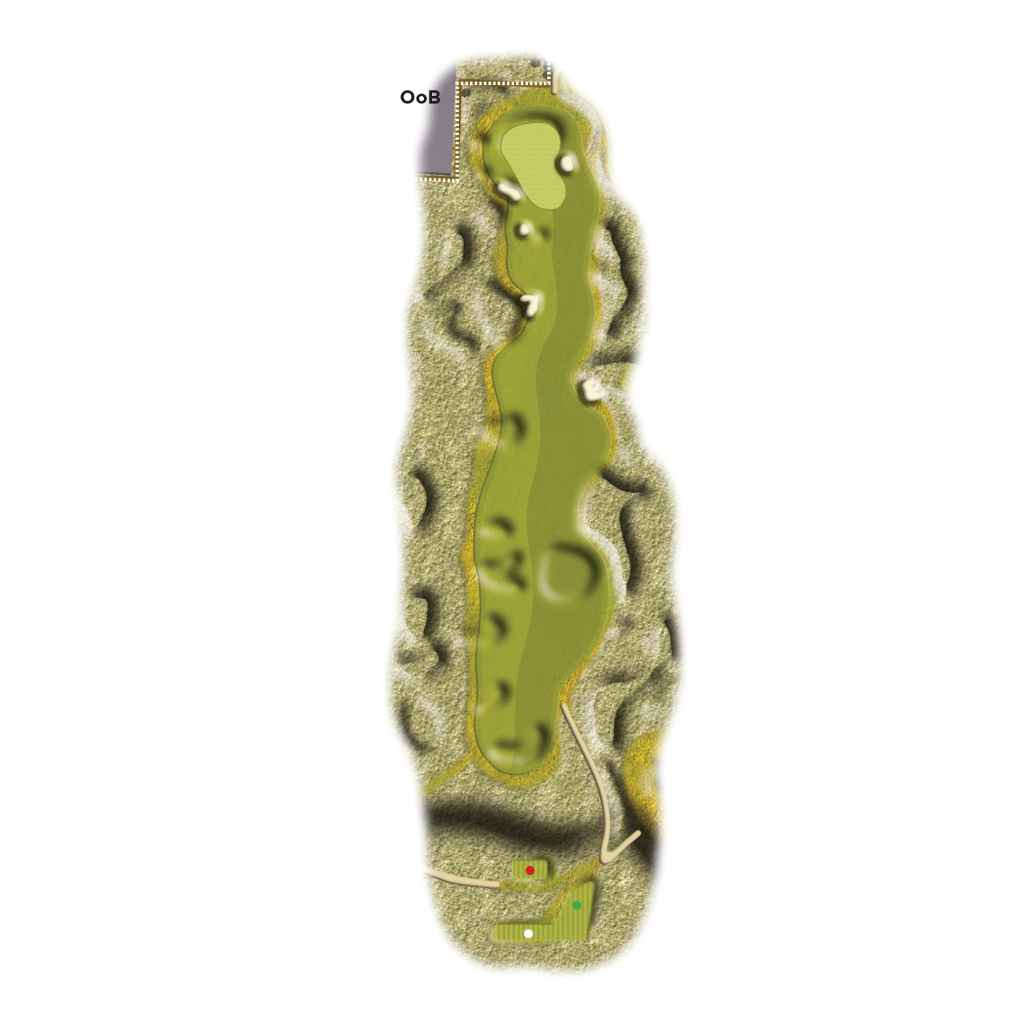
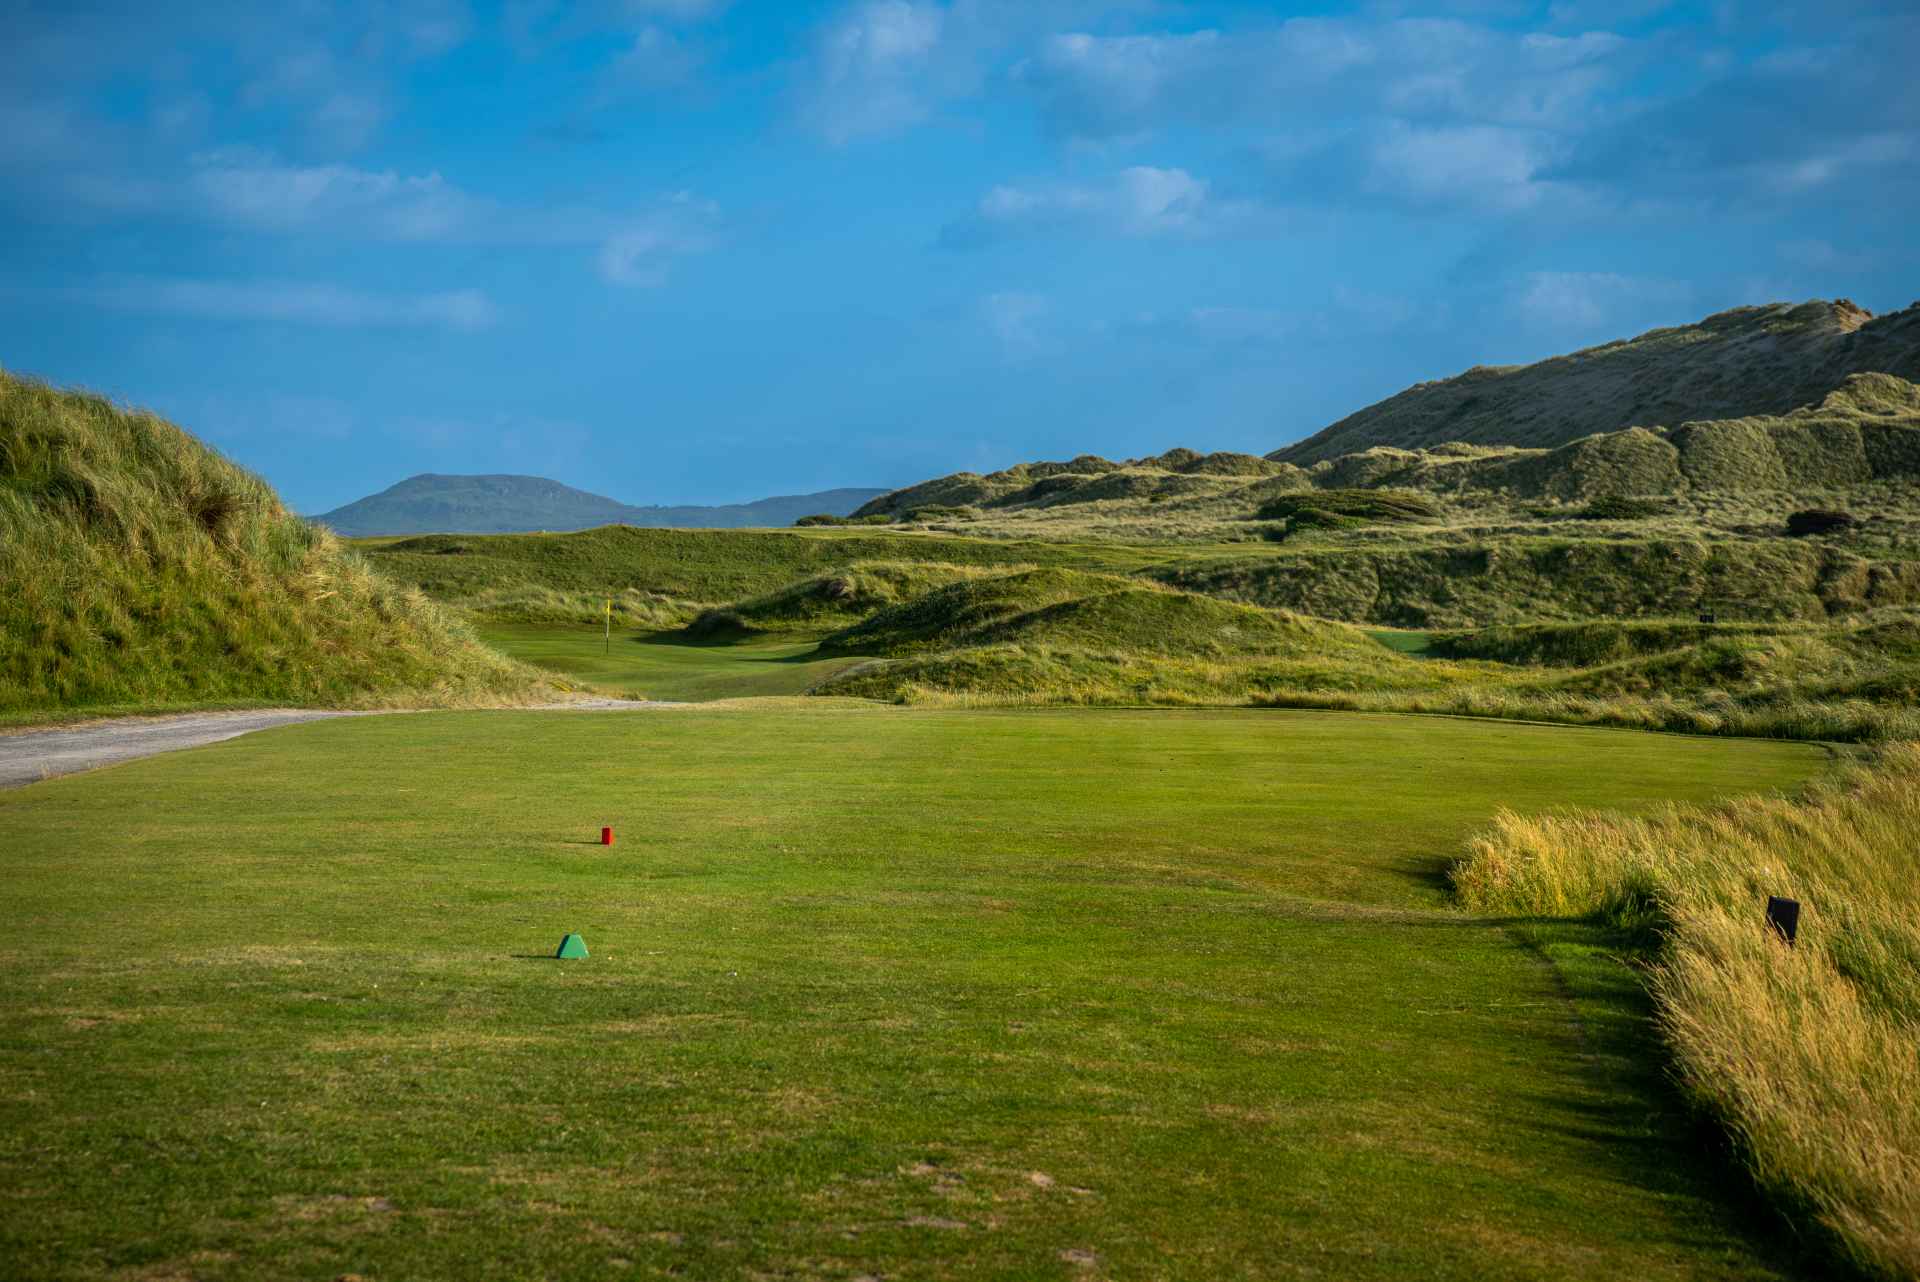
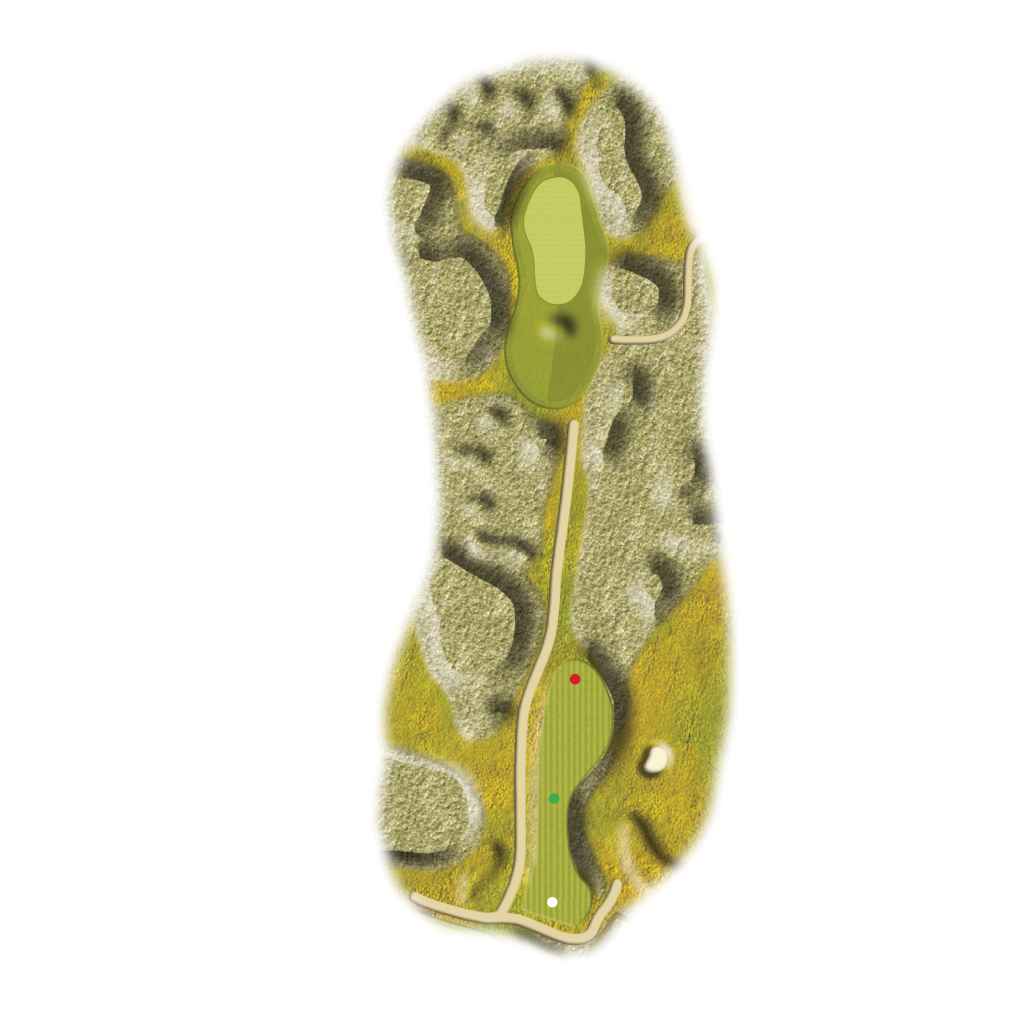
A medium length Par 3 with a generous bank that will reward players leaning against it.
Enjoy the view over Cullinamore Beach as you walk down the fairway…
Par 3
(White: 175yds – Green: 169yds – Red: 133yds)
Take enough club and use the left hand side of the green to enter the green on the safe side.
The green and its surrounds will allow the ball to roll towards the center of the green.
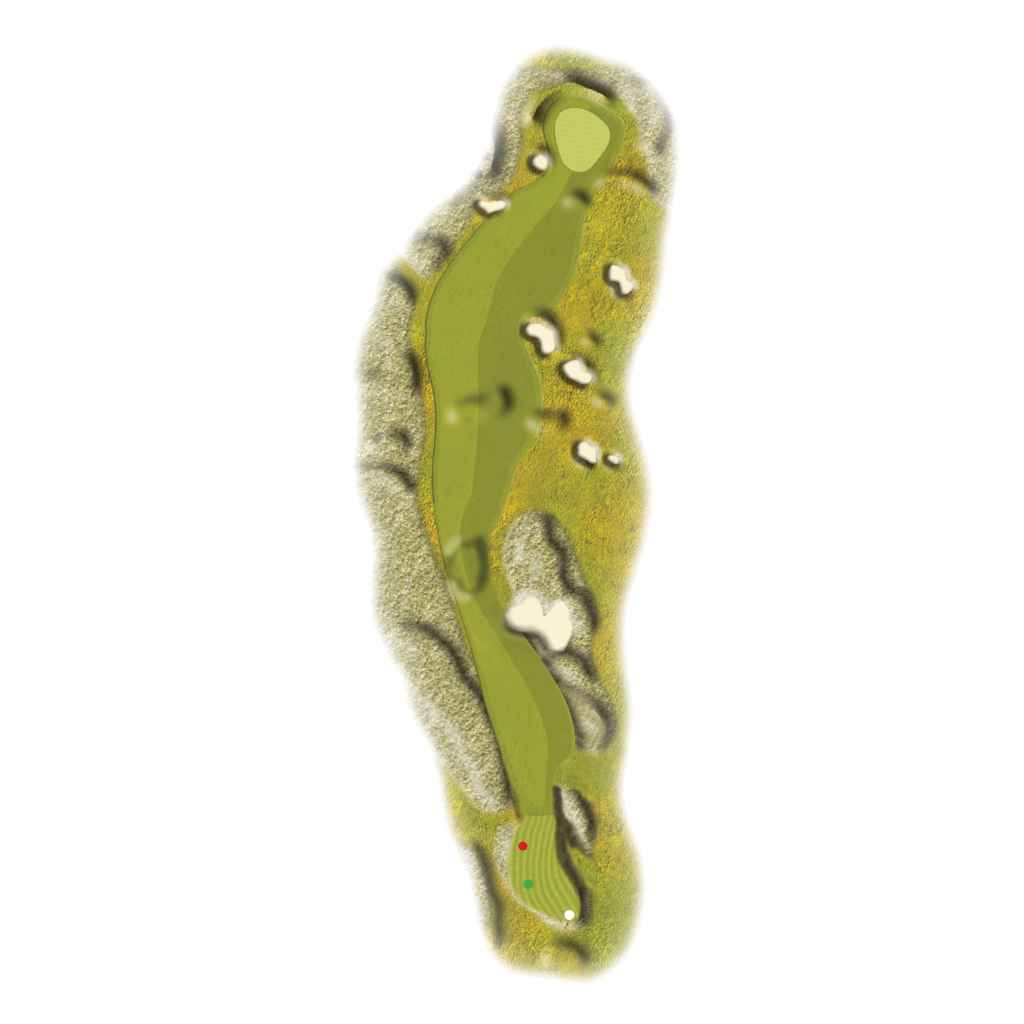
A straight forward Par 4 along the Culleenamore beach on which you may see horses galloping. A longer drive will allow a more aggressive approach for a birdie chance.
Par 4
(White: 402yds – Green: 375 yds – Red: 330yds)
Lean against the right hand side of the fairway for an easy regulation. Longer hitters can go for a more direct line off the tee. The approach can be played using the the front right of the green when the hole plays longer.
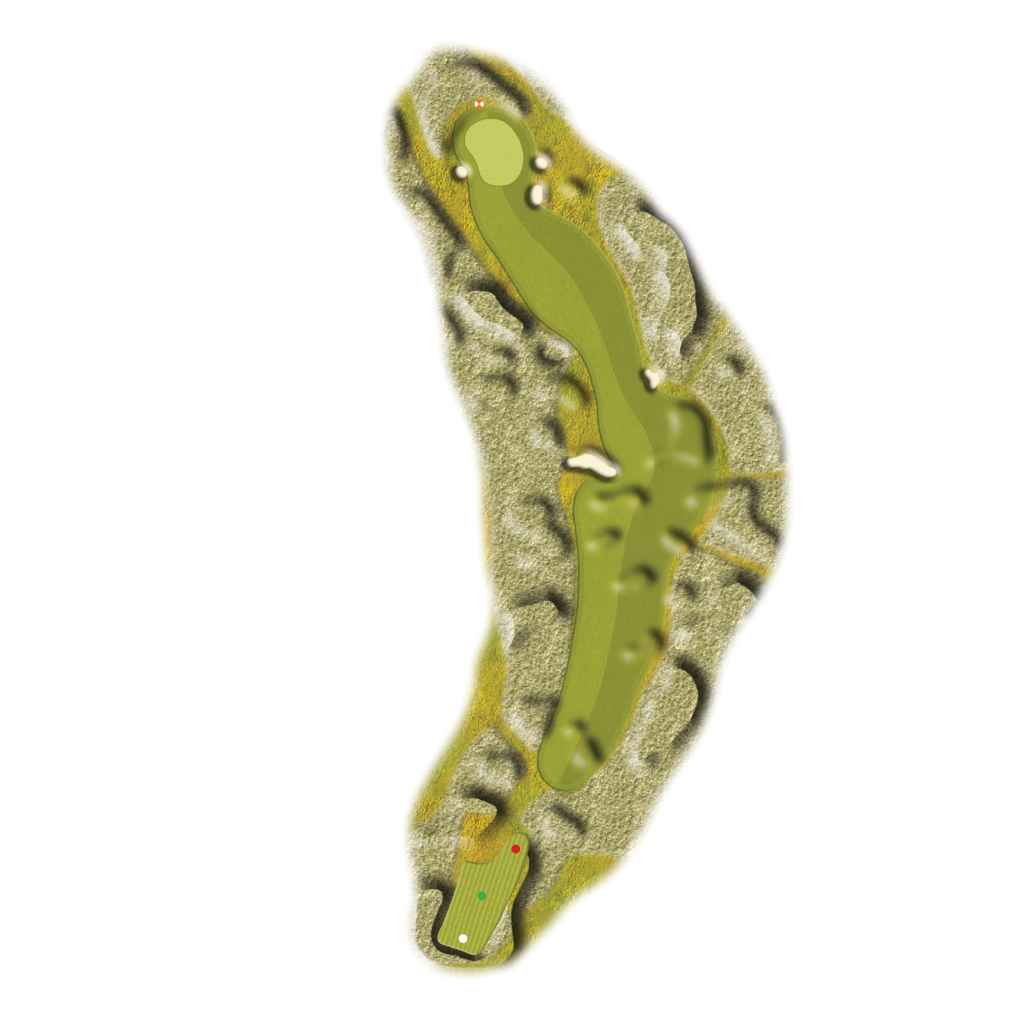
One more along the peaceful beach of Culleenamore. A funnel shape fairway suggests a conservative drive. This par 4 is deceivingly long with a shallow elevated green.
Par 4
(White: 354yds – Green: 311yds – Red: 291yds)
Place your drive in line with the right side of the green in the distance to find the fairway.
This hole does not play long but you will need a high trajectory to make the small green safely. Missing the green short will make scoring difficult.
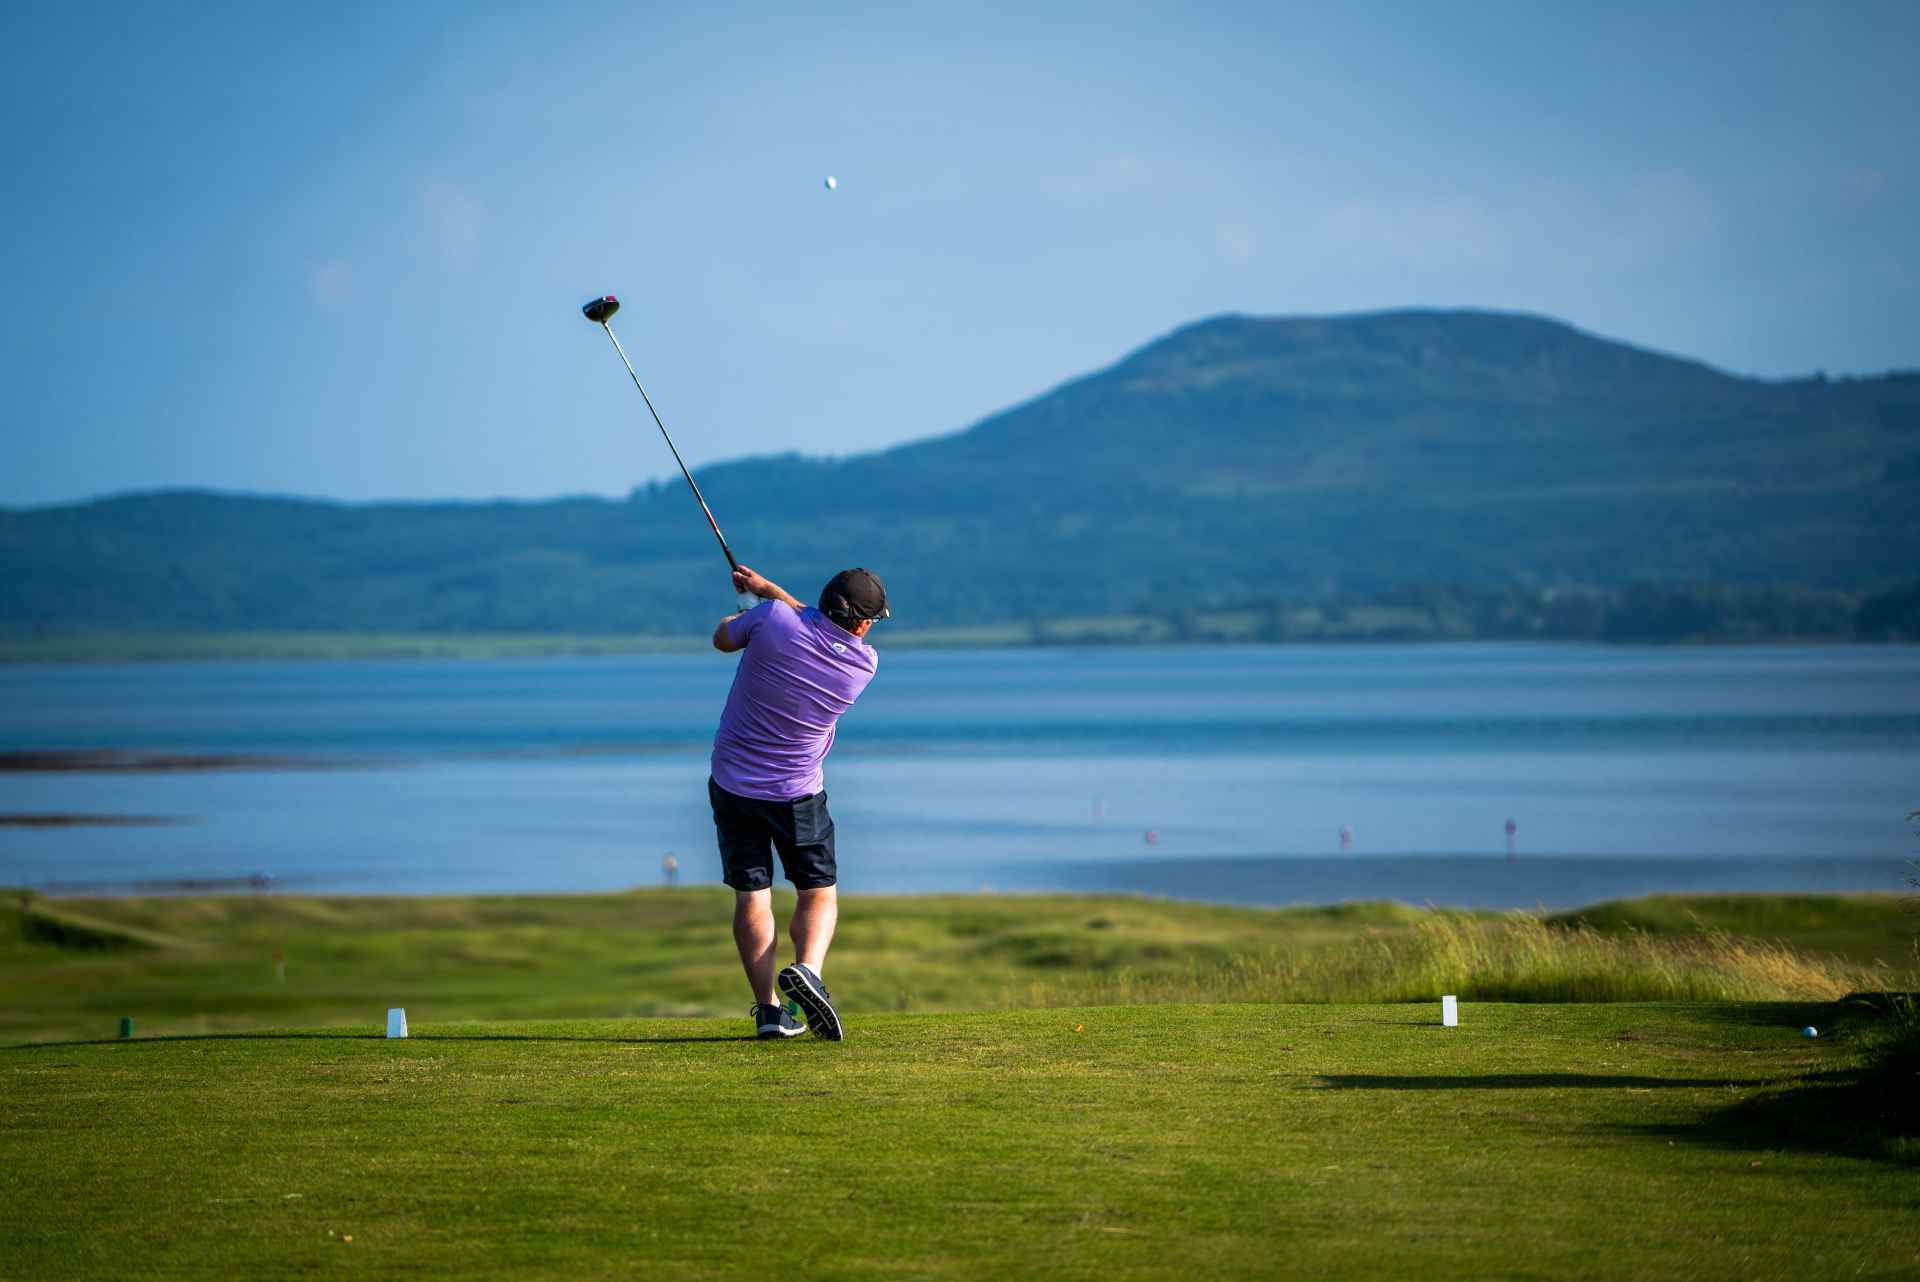
The most elevated tee shot on the course with a 360 degree view of the peninsula.
The dogleg left par 5 plays different in every wind. Your second shot may partially blind with the large undulations on the fairway block the view of the green.
Birdie or not. you will remember this hole forever!!
Par 5
(White: 510yds – Green: 481yds – Red: 441yds)
Your first heroic tee shot from the eleveated tee box. Keep the ball right of the Clubhouse in the distance not to take too much off the dogleg.
Aim at the distance maker behind the green until the flag appears as you progress through the most undulated fairway you have ever stepped on!
The bowl shaped green will often feed your approach towards the pin and assists a birdie chance
A sharp dogleg right that will open up with a view of the Atlantic Ocean and its crashing waves over the infinity green. Enjoy the views and the sea air…
Par 4
(White: 406yds – Green: 371yds – Red: 344yds)
Follow the dogleg right off the tee and cut as much as the wind will allow you.
Your second shot will give you a memorable view with the Atlantic as a backdrop. Use the front right corner shoulder of the green if approaching from far to find the green.
An elevated tee shot against the Dune looking down a narrow fairway alongside Strandhill Beach. A narrow looking hole with a great view.
Par 4
(White: 381yds – Green: 363yds – Red: 348yds)
Placing your drive short of the fairway bunker on the right will leave you a short to mid iron for your regulation.
Distance control is key for your second shot to manage the 42 yard deep green
A shorter par 4 with a gentle dogleg left and well protected green that will need a high trajectory for the best chance to get a regulation.
Par 4
(White: 334yds – Green: 317yds – Red: 307yds)
A shorter par 4 with a gentle dogleg left and well protected green that will need a high trajectory for the best chance to get a regulation.
The shortest Par 3 on the Links with 4 bunkers protecting any pin positions.
Par 3
(White: 148yds – Green: 128yds – Red: 118yds)
The shortest Par 3 on the Links with 4 bunkers protecting any pin positions.
A tapered looking fairway to straight line for the green. The bunkers on the right off the tee will close the hole for longer hitters.
Par 4
(White: 345yds – Green: 319yds – Red: 312yds)
A narrow but straight forward read off the tee. You can lean against the right hand of the hole but beware of the well placed fairway bunkers.
Club yourself well for the green to favour a putt from below the hole.

A soft dogleg right pivoting around the fairway bunkers. The approach makes the green deceivably small as the uneven green surround can deflect balls away from the pin
Par 4
(White: 352yds – Green: 332yds – Red: 316yds)
Keep left of the bunkers off the tee unless you can carry that far.
The short par 4 is well protected by and undulated green surround that will challenge your tactics.
Playing uphill off the tee into a bottleneck for a shorter 2nd shot to an infinity green looking over Culleenamore Beach. The bunkers and wind of the moment will define your choices….
Par 4
(White: 366yds – Green: 338yds – Red: 329yds)
Your best drive should position you between the two bunkers. After opening the dogleg left, approaching the green from the front under the wind or carrying to the pin will give you options depending on the day.
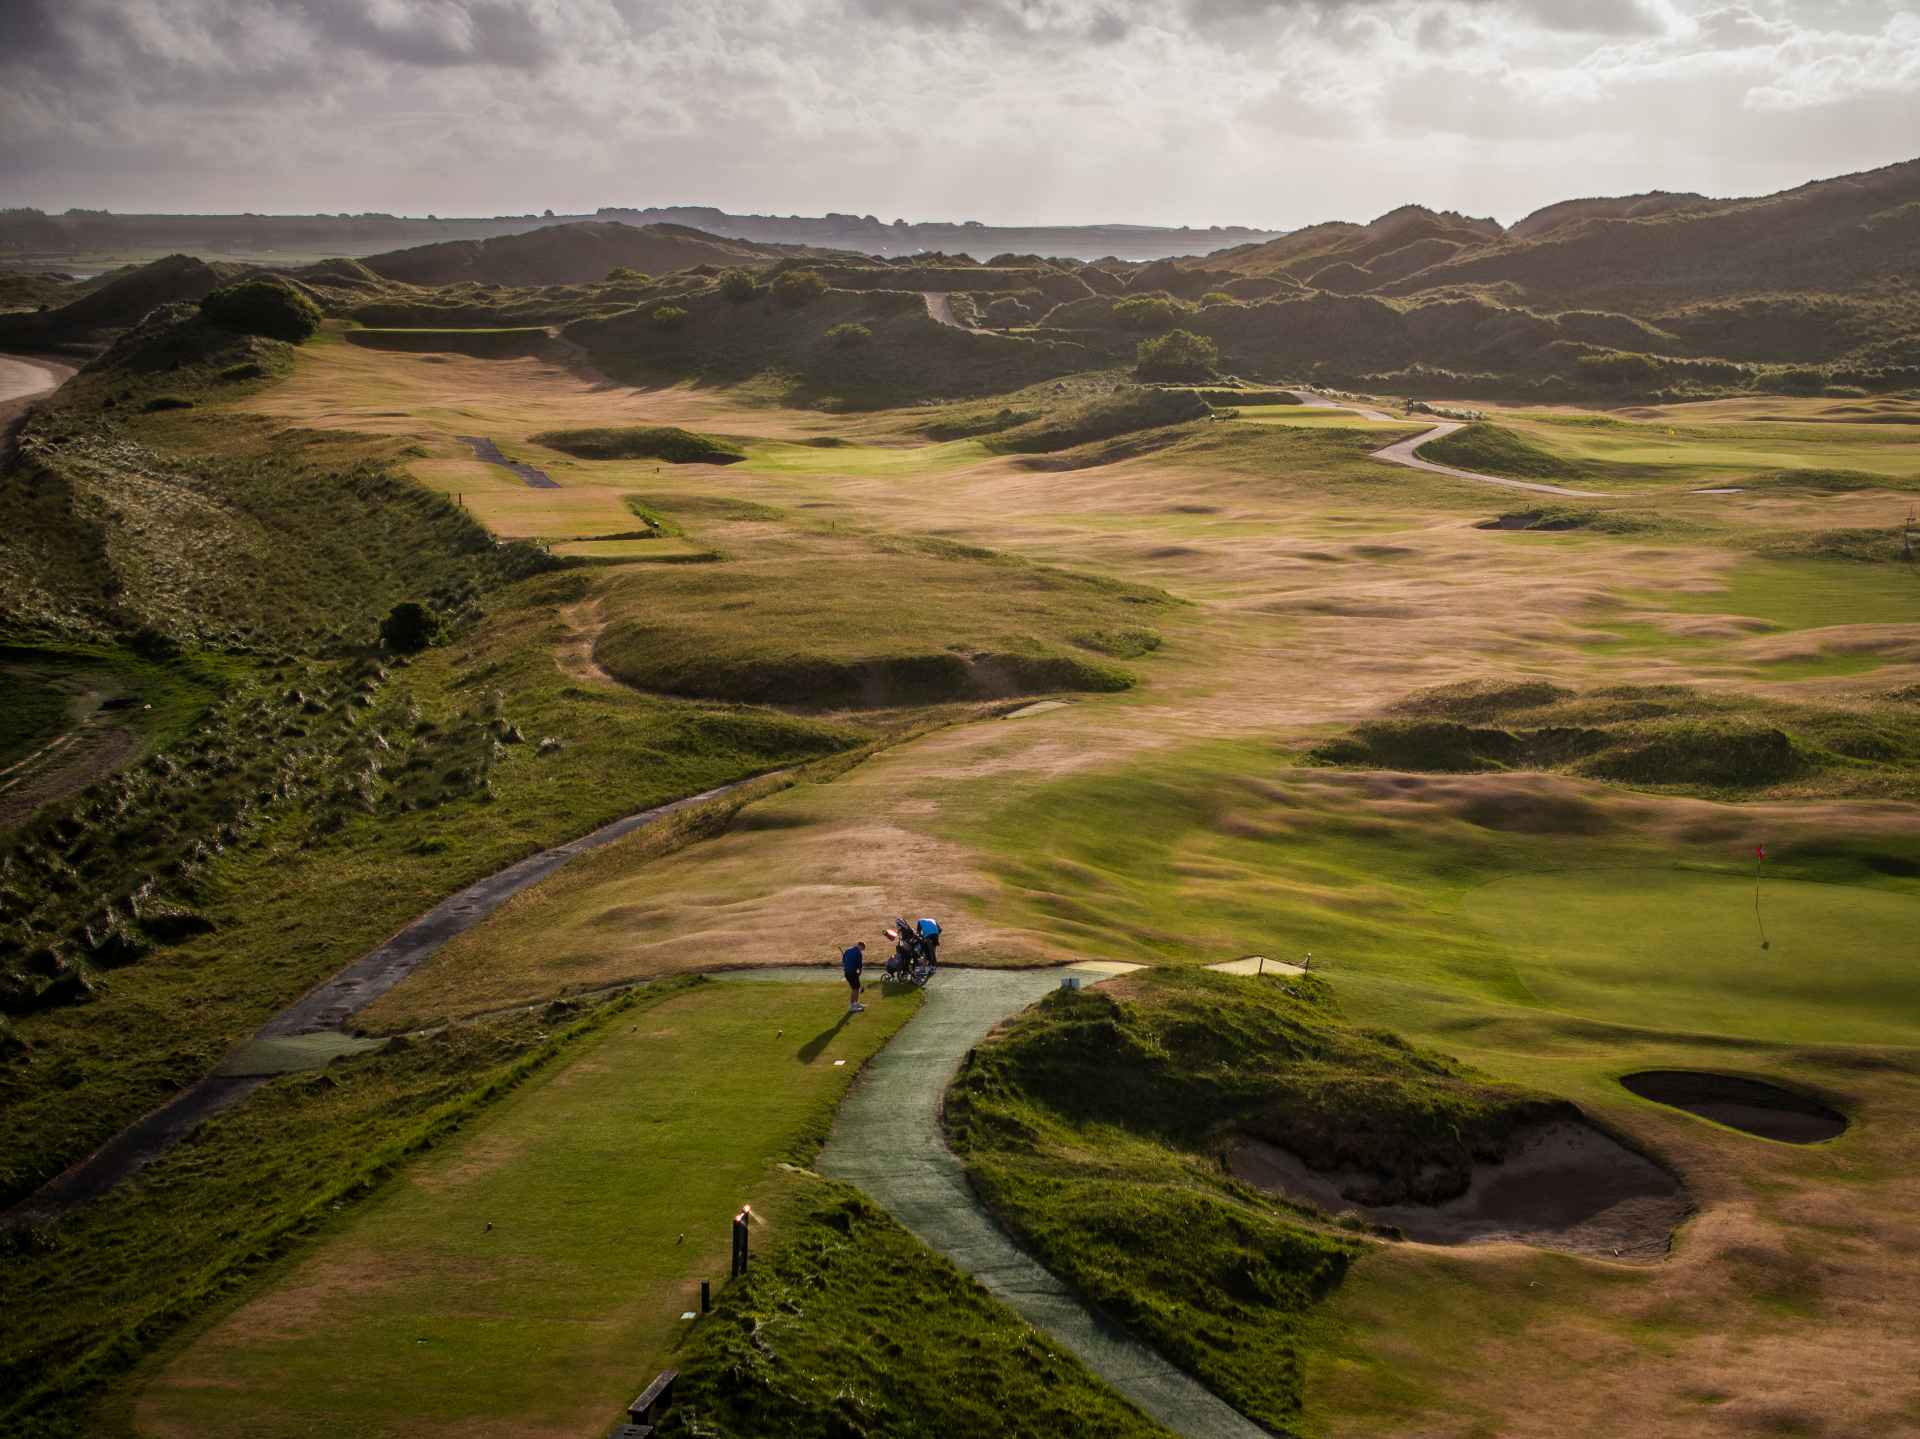
A blind tee shot into a narrow fairway followed by an approach to a small green surrounded by large dunes… a guaranteed talking point for the 19th.
Par 4
(White: 361yds – Green: 346yds – Red: 327yds)
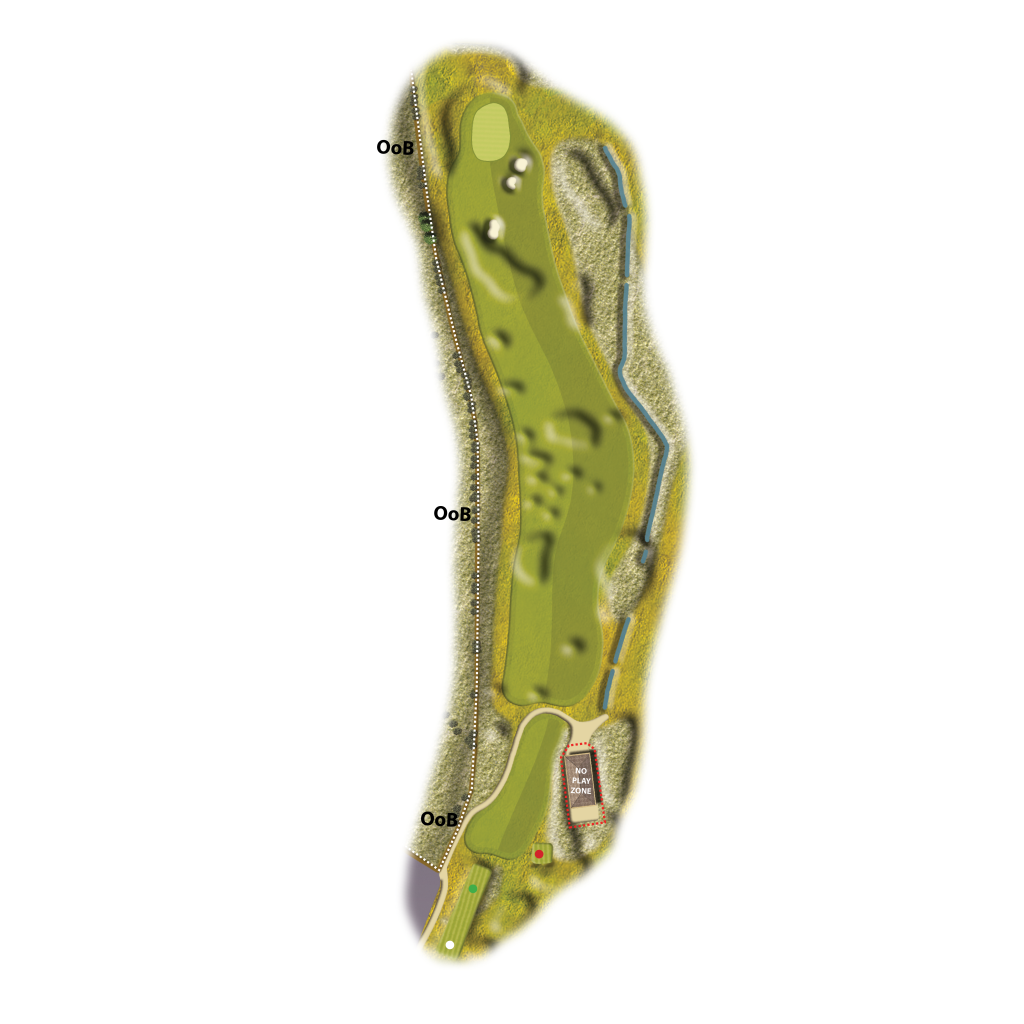
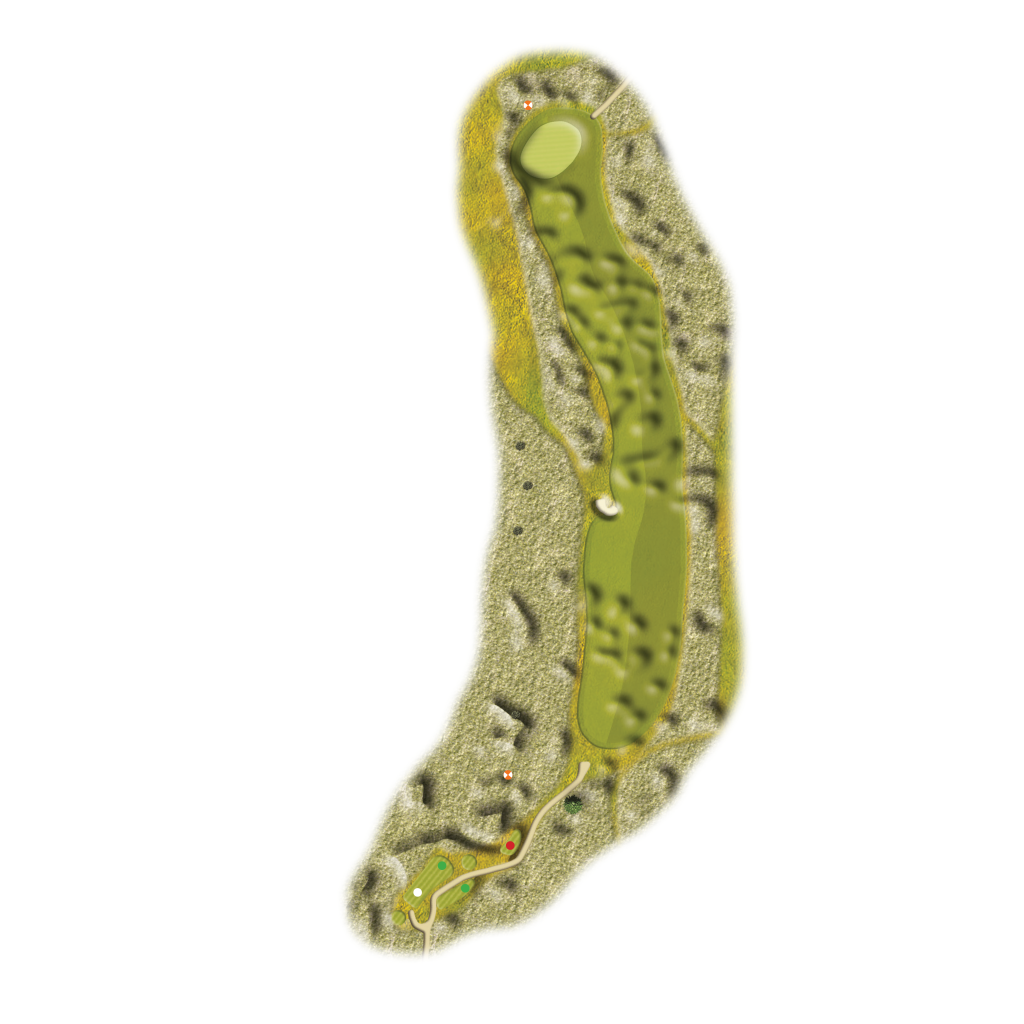
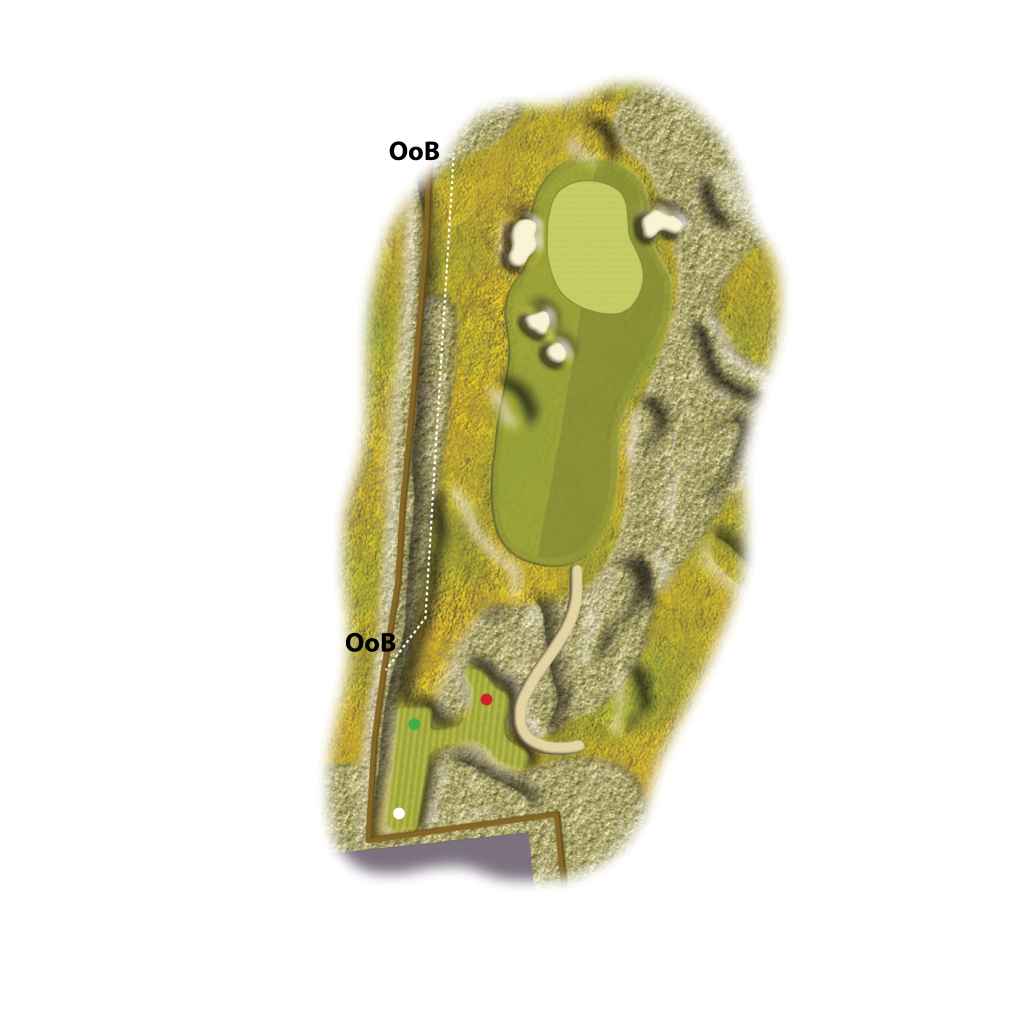
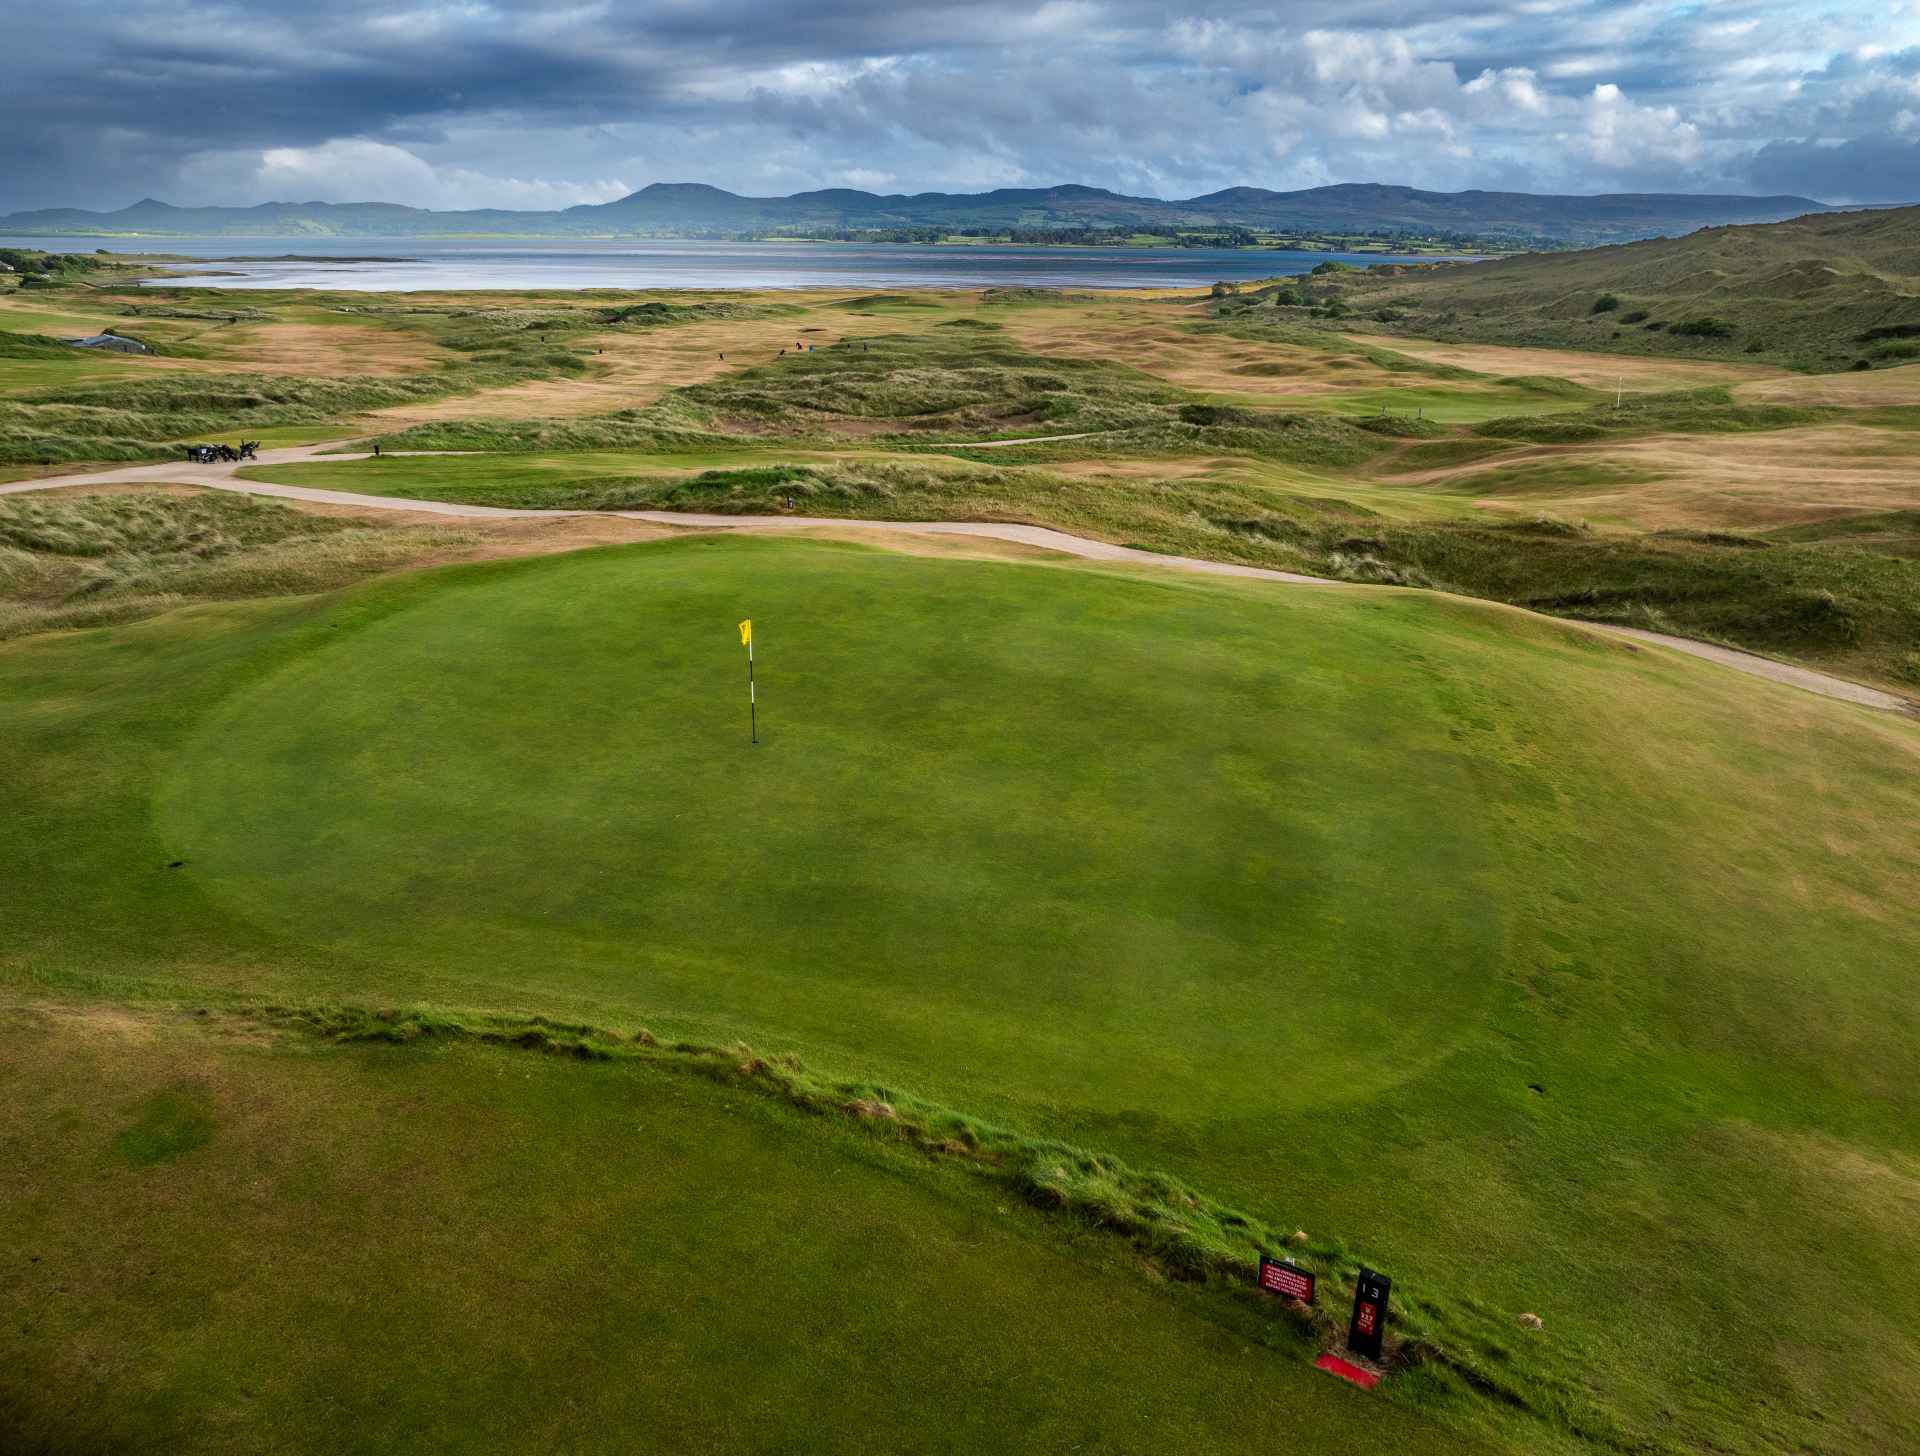
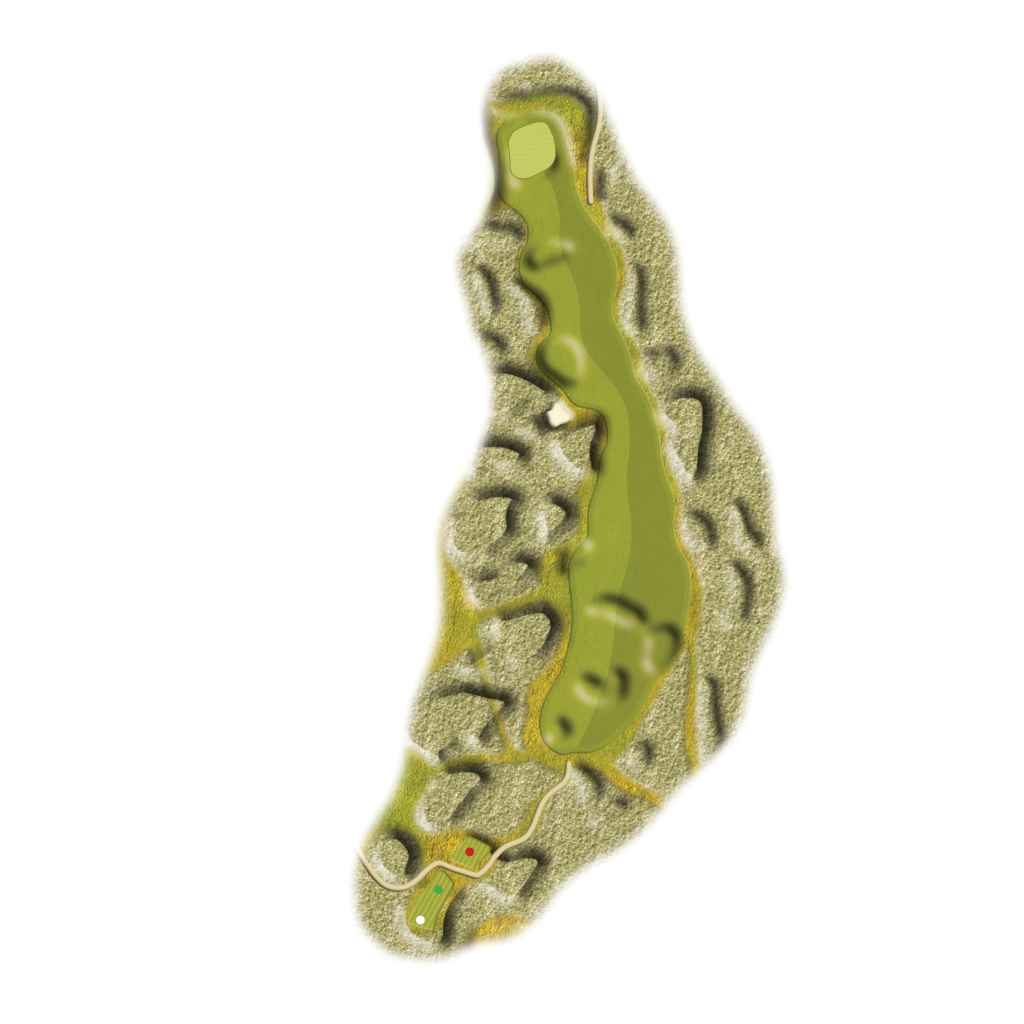
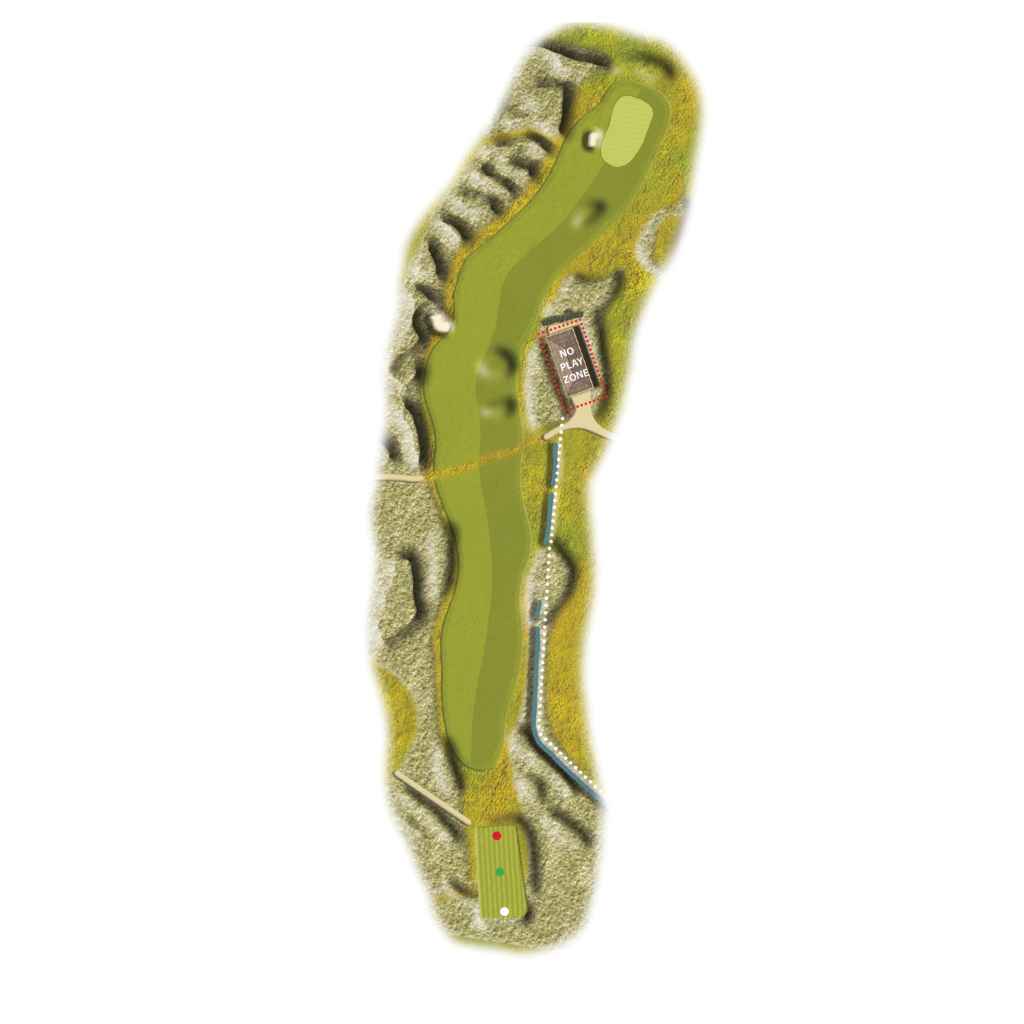
“Lucky for some…” This special challenge suggests a 200 yards carry over the white stone to find the best part of the fairway below. The second shot is played through the bottleneck approach to a very well protected green. A high trajectory is recommended to secure a stress free regulation.
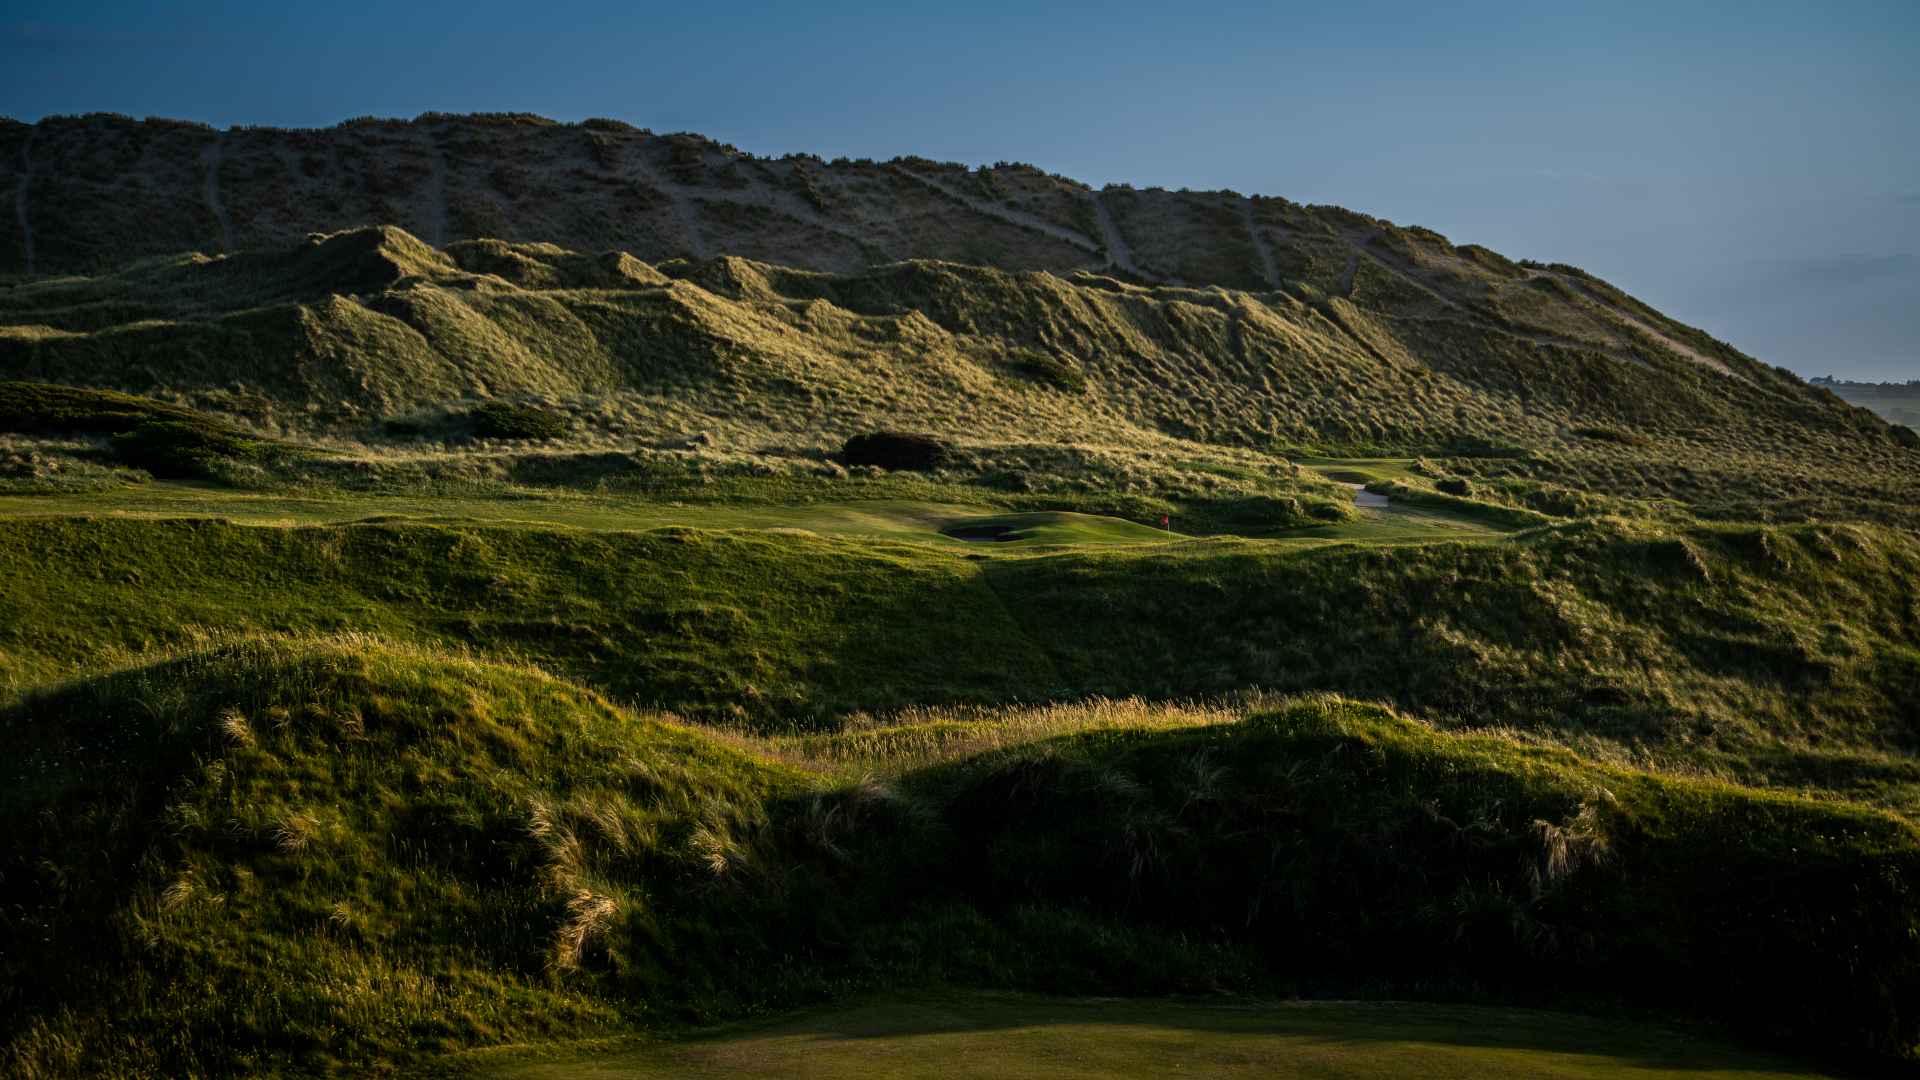
A narrow but reachable hole with the front end allowing a rolling ball to come in. The green has no bunkers but enough shoulders to challenge any player.
Par 3
(White: 166yds – Green: 148yds – Red: 137yds)
More accuracy needed here…. Playing an extra club to remain decisive is key. Shorter hitters can use the front of the green to ease the daunting look of the hole.
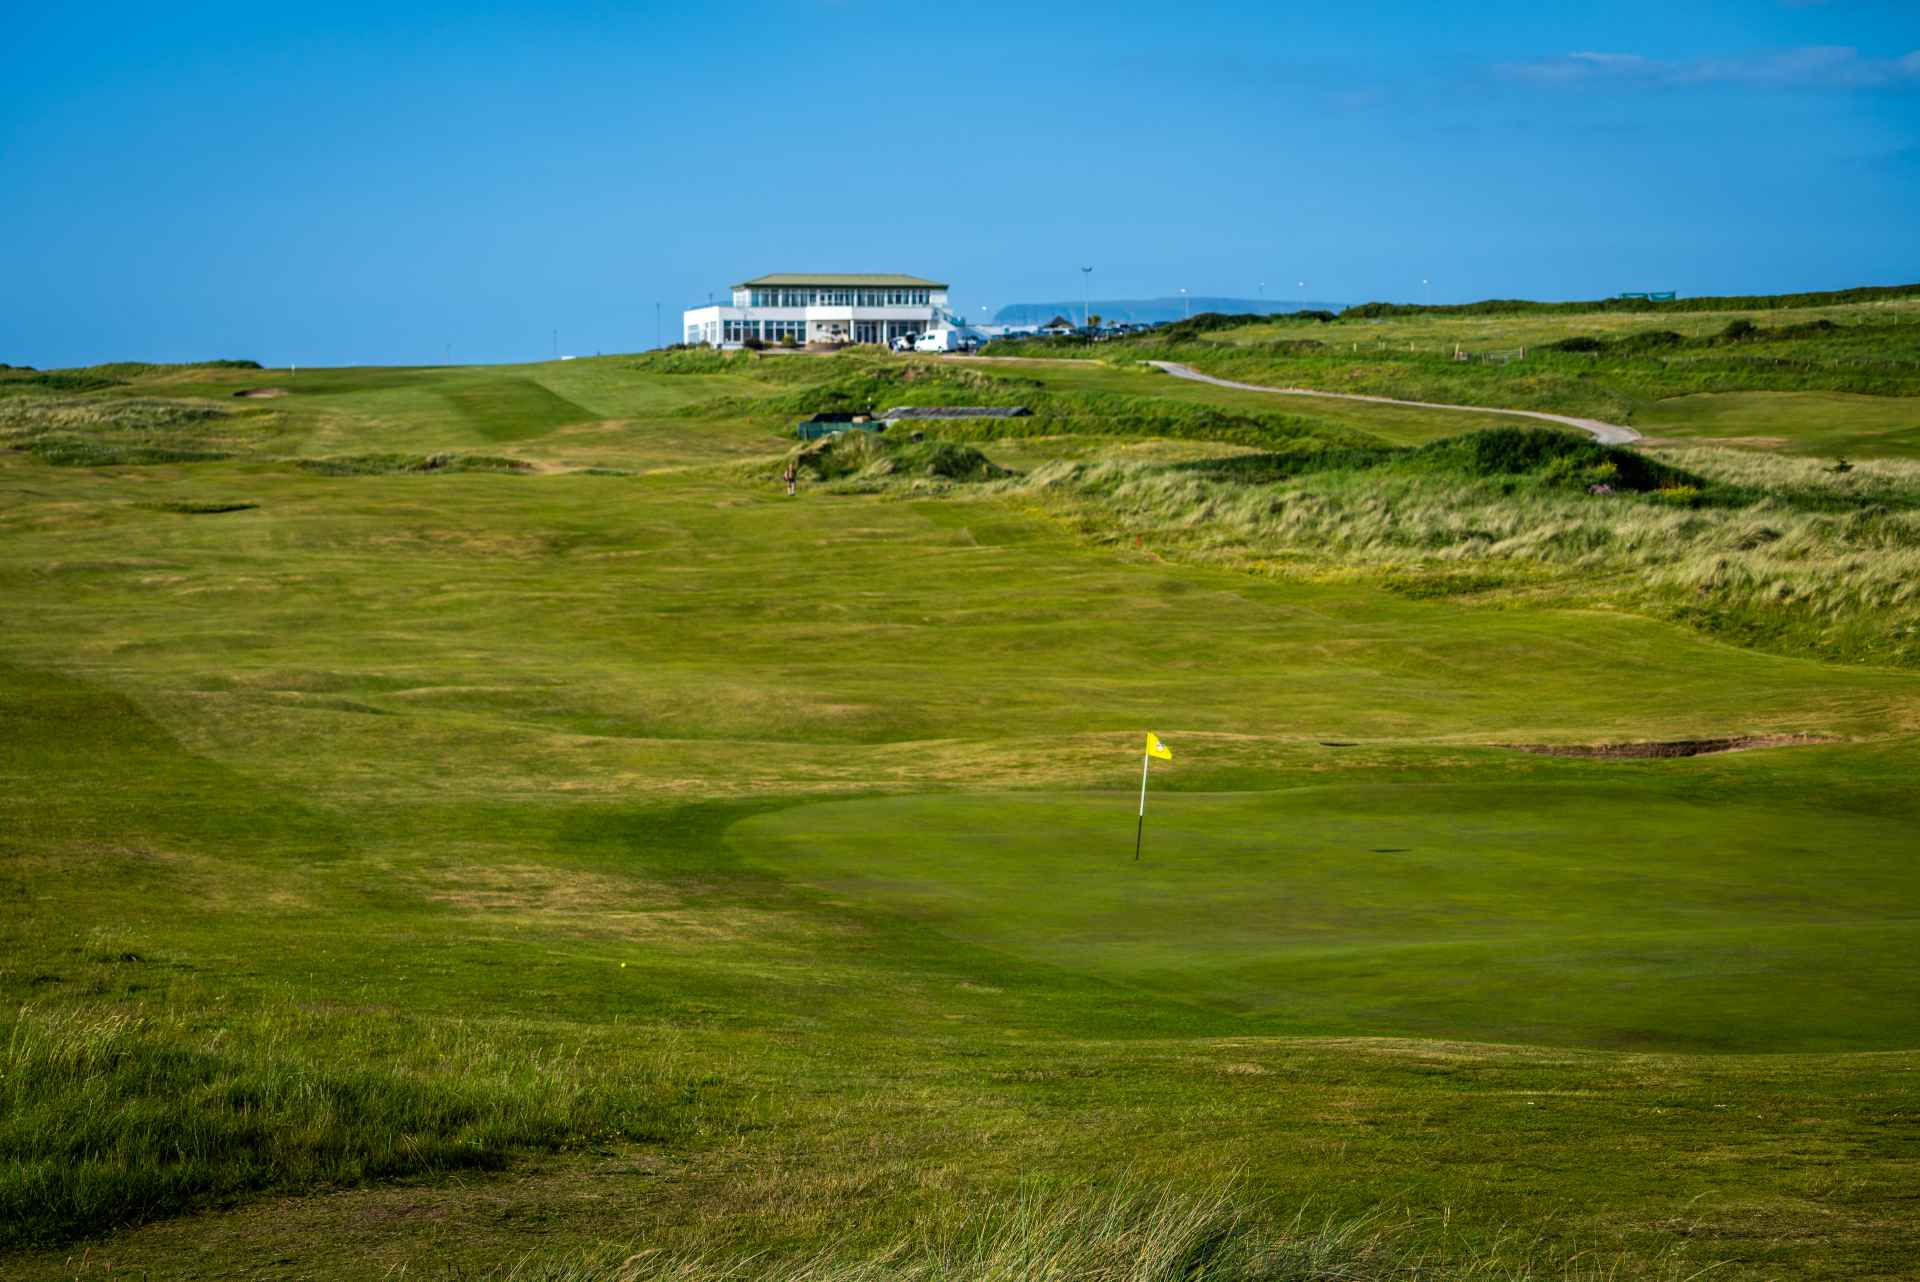
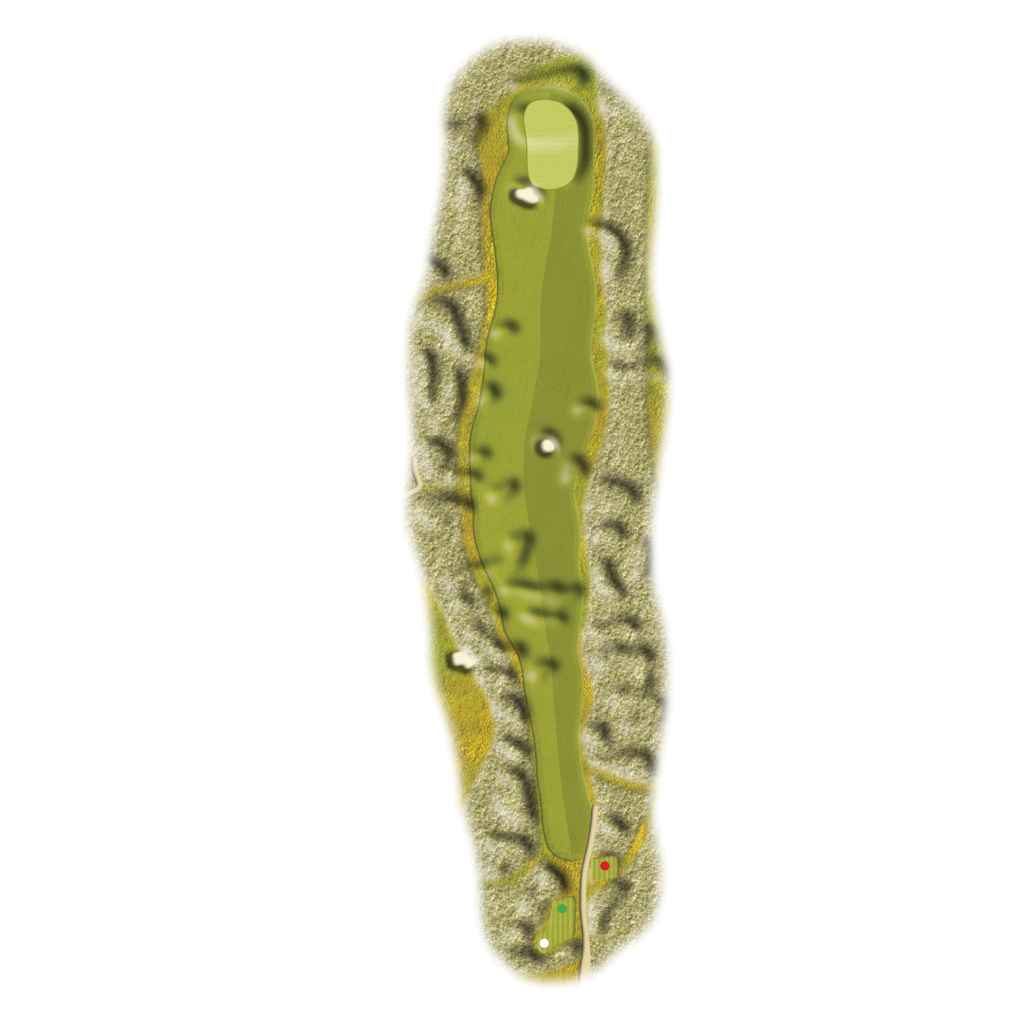
A par 4 like no other… find your line off the tee based on how far you can carry, but bear in mind the landing zones become progressively smaller as you go up towards the green. a regulation and a well earned par will give you wings for the next drive!
Par 4
(White: 337yds – Green: 328yds – Red: 301yds)
One other quirky scenario to test your intuition. The multi tier fairway will give you options. The risk-reward element of the tee will dictate the ease of the approach.
Play your approach high and rather left for best outcome
A long straight par 4 demanding off tee as the fairway bunkers stands in the way of a good attempt. The 2nd shot is open from the front right and the 2 tier green can make it difficult to be get close from your approach.
Par 4
(White: 413yds – Green: 395yds – Red: 371yds)
An inviting tee shot for a big drive. Beware of the well position bunker.
Once in play, use the right side of the green as the slopes will move the ball back towards the green. Note the pin position as the two tier green will influence your decision further.
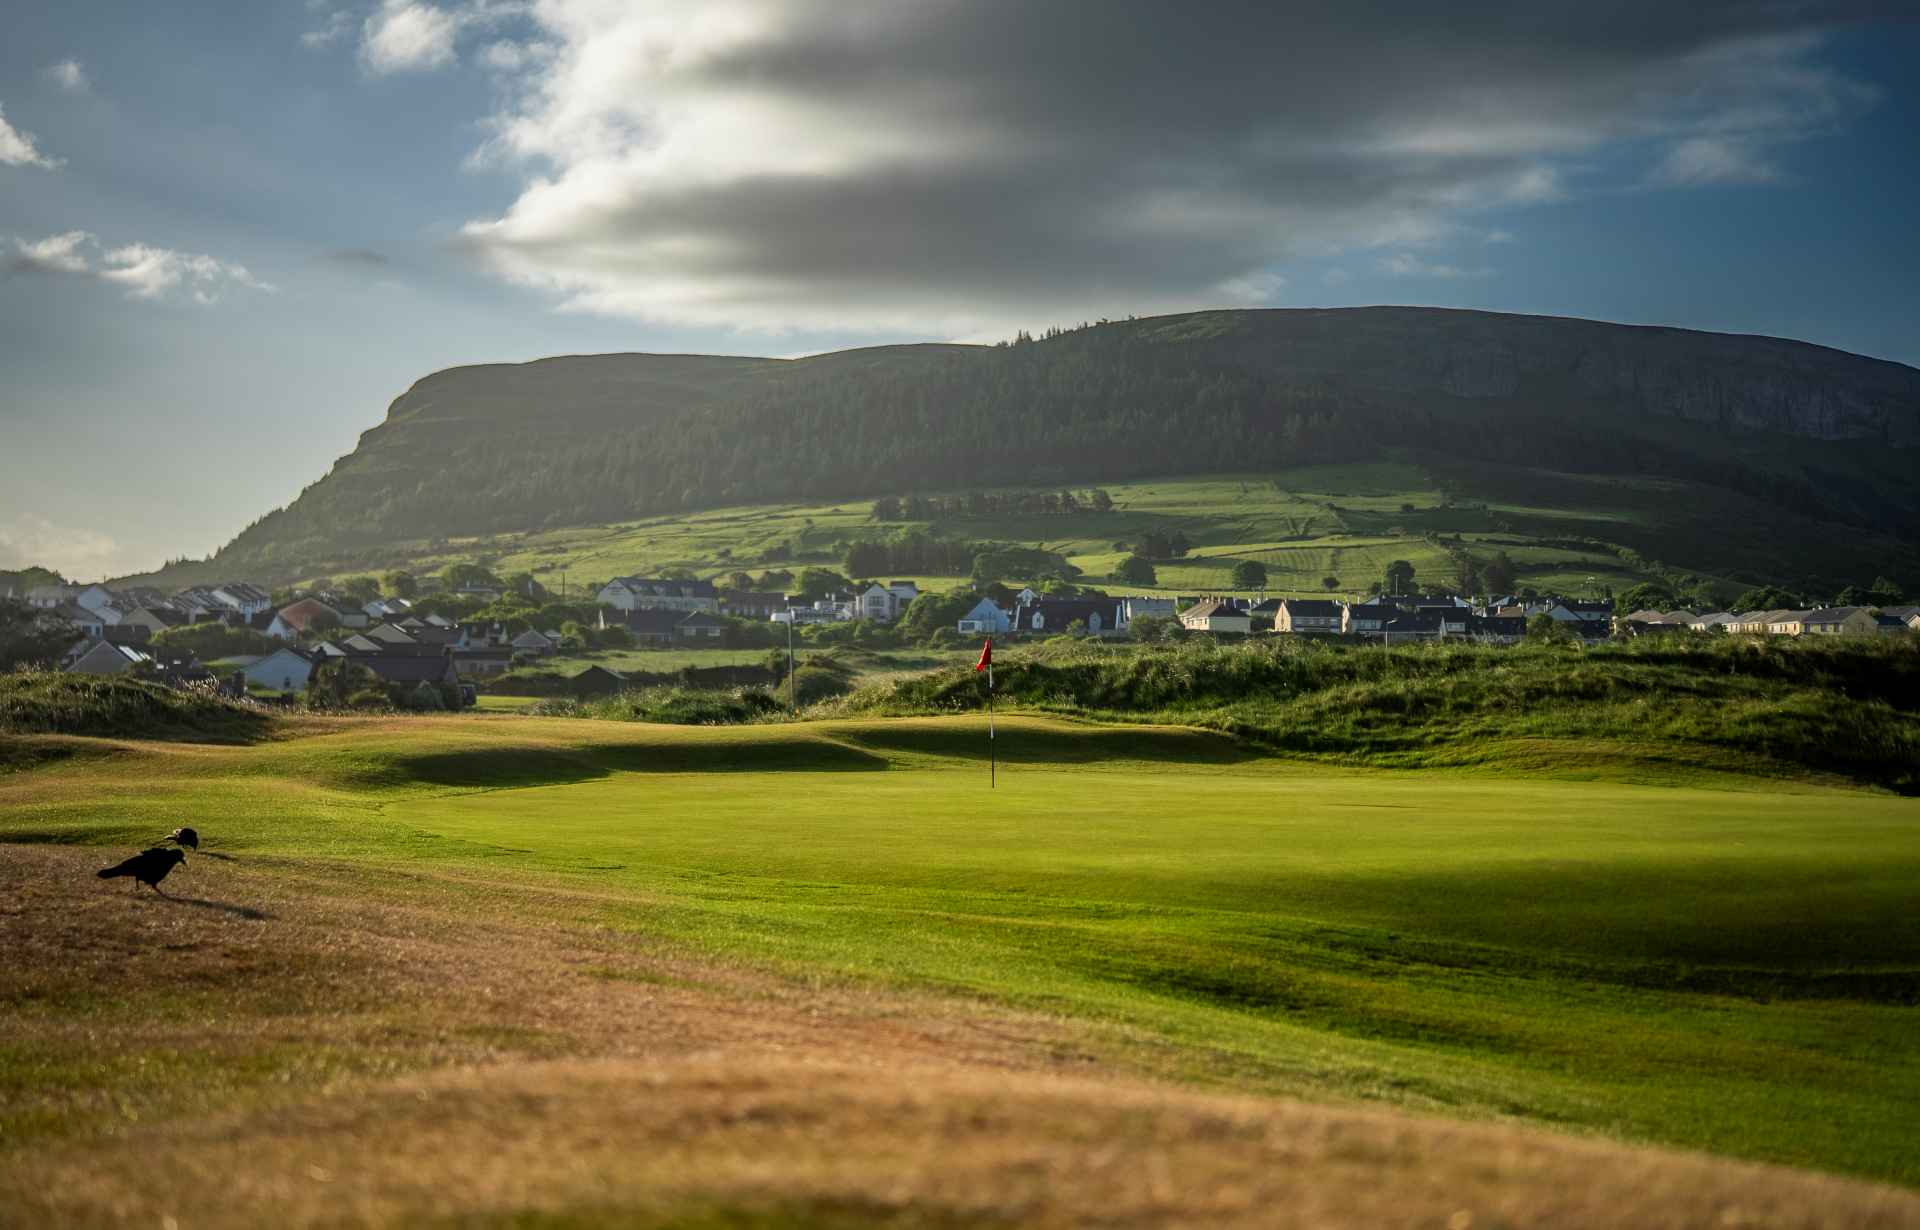
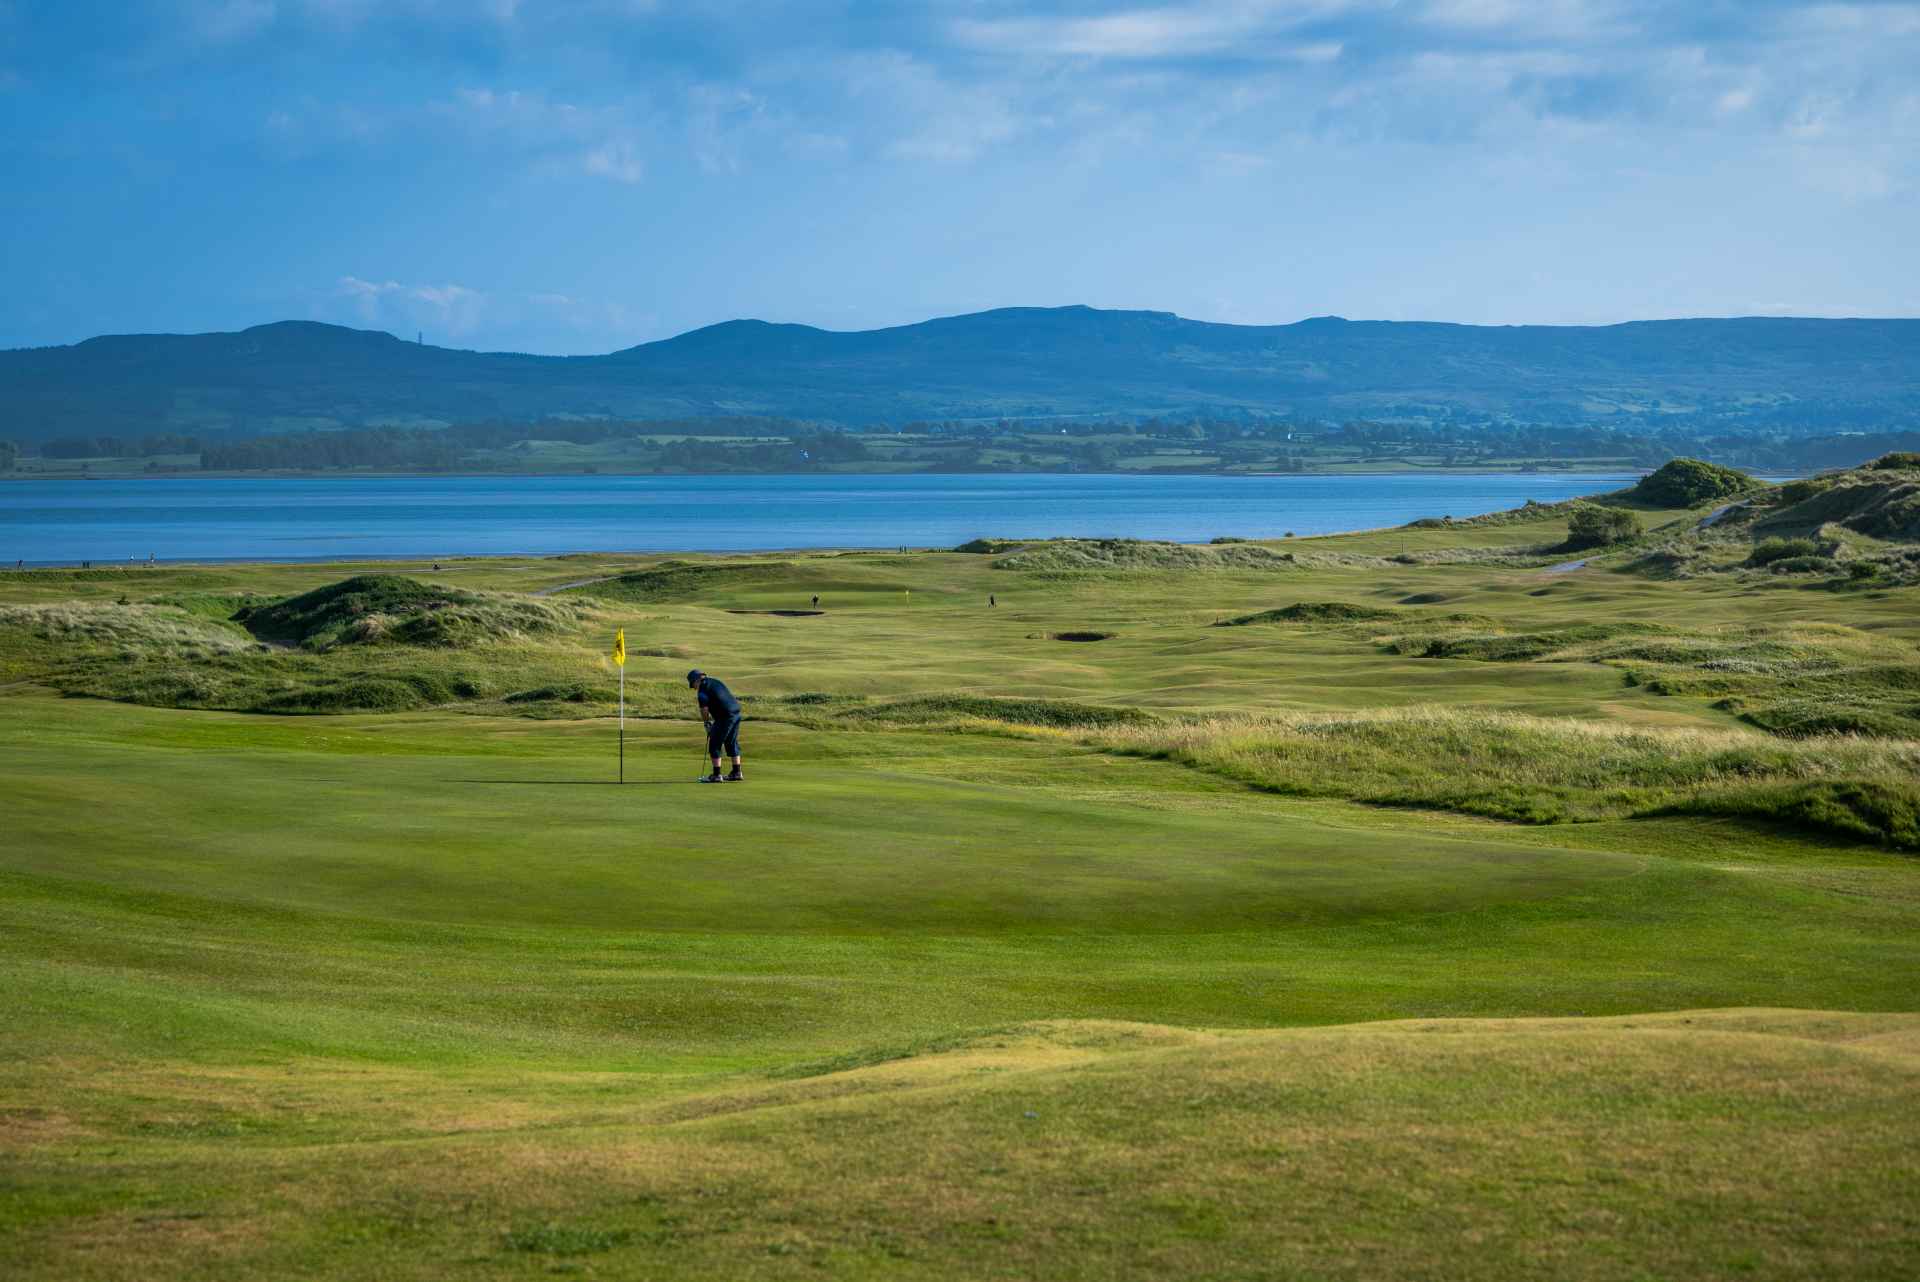
Downhill par 3 with the Knocknarea sitting in the landscape. The left hand side bunkers protect the best line to green but a miss short right does not prevent from a straight forward up and down
Par 3
(White: 199yds – Green: 177yds – Red: 159yds)
Play this the links way and use the approach to land your tee shot. The middle left, over the 1st bunker, is your best line. The green is to often hard to hold especially down wind.
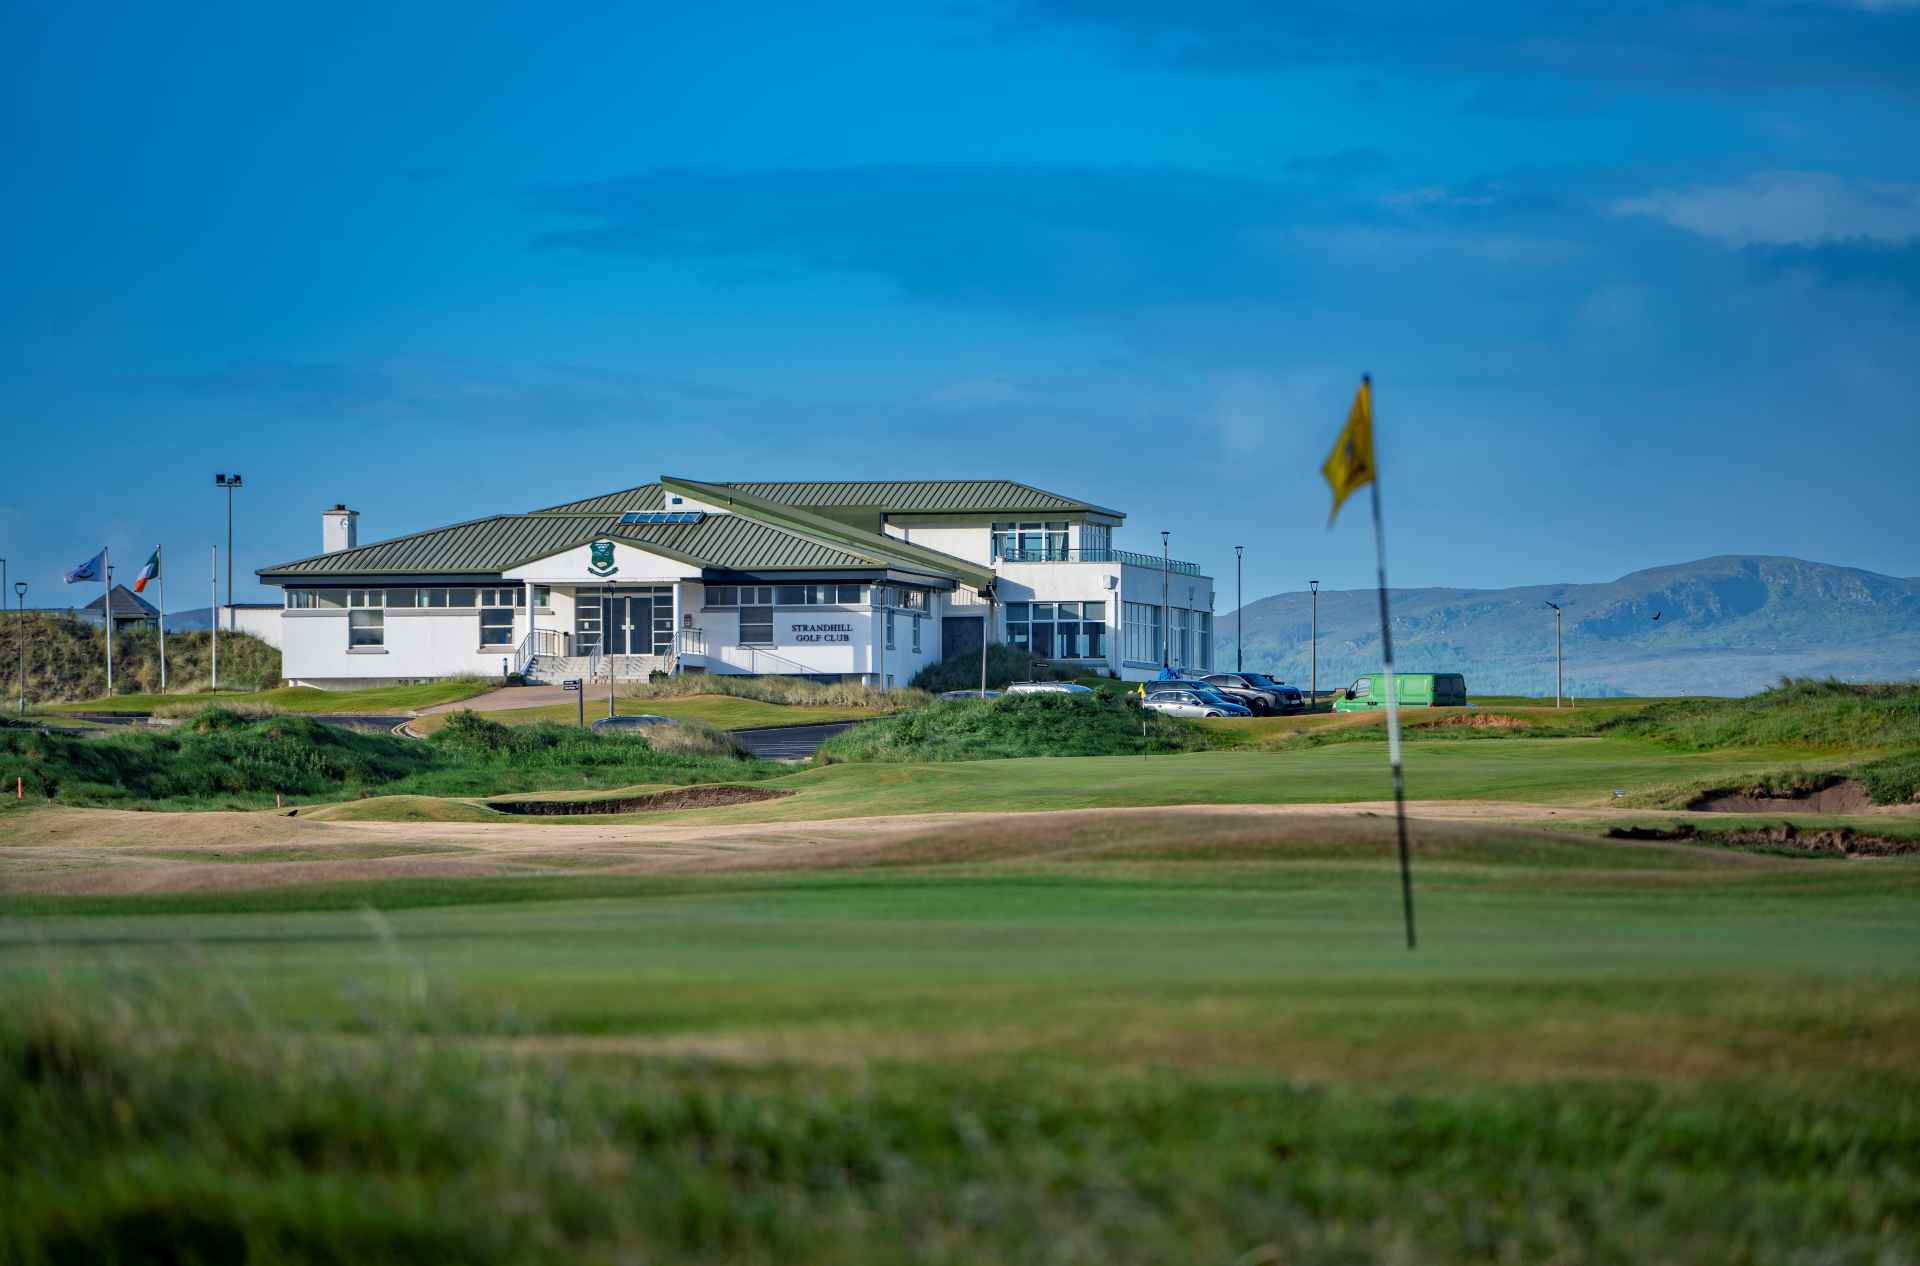
A long playing dogleg right par 4 that will test your nerves for the last drive of the round. The rising profile from the 2nd half of the hole makes the hole play longer. A par is great finish that will bring you back… Enjoy your visit to the Golf Shop and the Bar to complete your experience with us
Par 4
(White: 444yds – Green: 416yds – Red: 405yds)
A solid last drive to find the fairway is a must for chance of a regulation. Your 2nd shot is played uphill and 2 extra clubs to lean against the high side of the green (right) will put you in the best position. The slope on green is most pronounced so keep above the hole!

Strandhill Golf Club,
Golf Course Rd,
Strandhill, Co. Sligo, Ireland
+353 71 916 8188
Email Us

© 2026 Strandhill Golf ClubPrivacyCookiesTermsAccessibility
 Splash